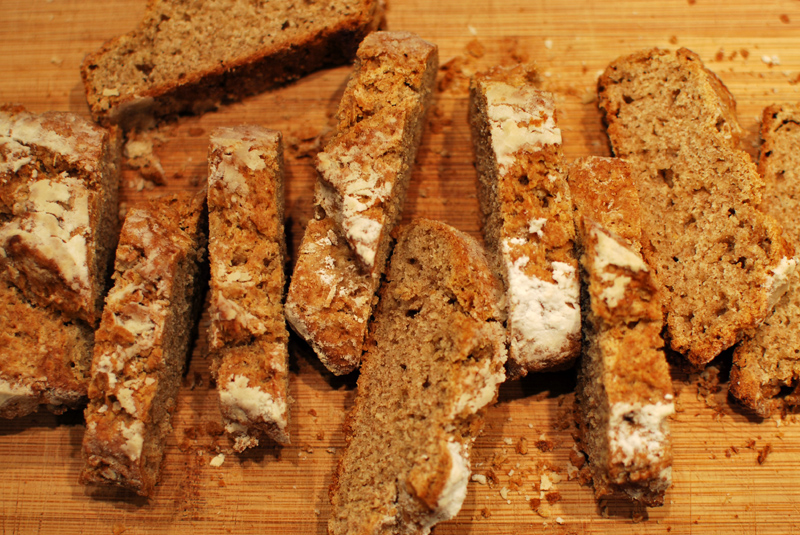
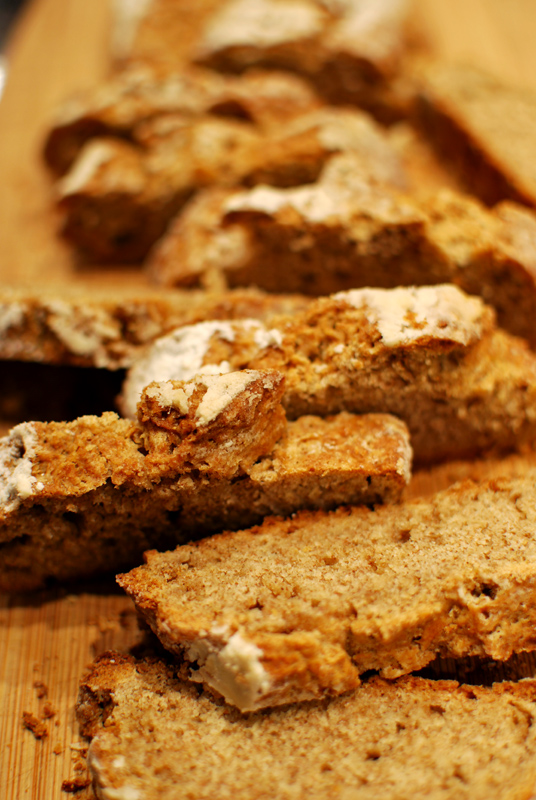
Brown Soda Bread “Baguettes”

Week Forty-Six: Professional Recipes

After I ended last week on such a sour note (well, garlic, really), I decided this week to give myself a little help.  Rather than try to concoct strange things all on my own, this week I’ll be starting with some guarantee of success by using recipes from professional establishments.  Have I been to any of these establishments, whether bakery, cafe, or restaurant, and have I enjoyed these breads in their natural environments?

No.

No, I haven’t.

*Gallic shrug*

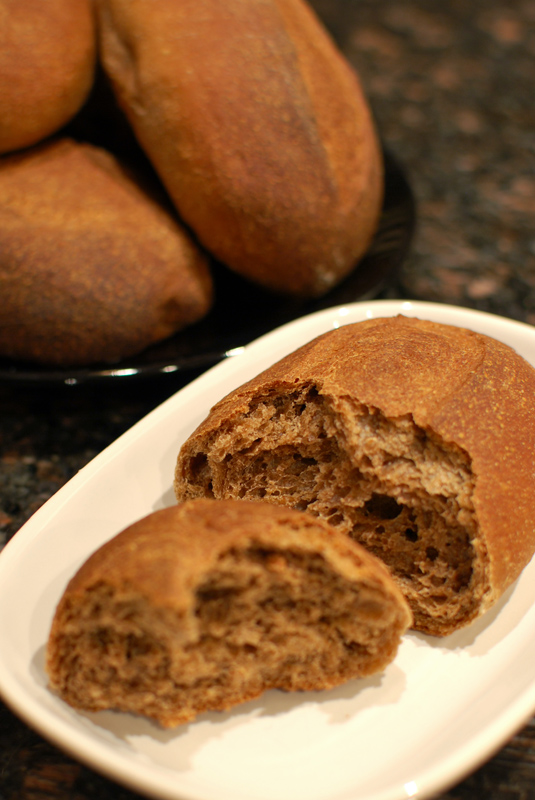
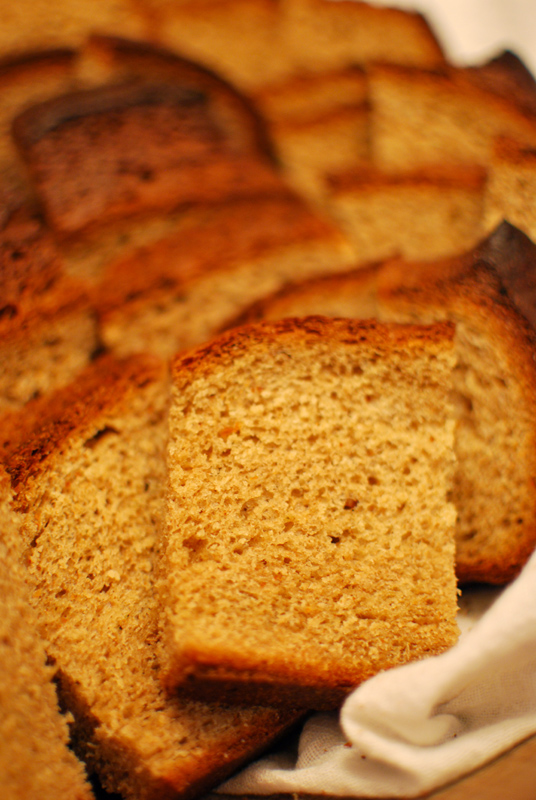
This week starts with a type of bread that I dearly love, an Irish-style soda bread.  This version, though the ingredients are not out of the ordinary, is unusual in makeup.  Traditionally, soda breads are made in large, round loaves, and served in wedges.  But today’s recipe, as served at Downey’s restaurant in Santa Barbara, is made into long “baguettes”, and served in slices.

Purists may howl at this, but I think this is actually a much better method.  My favorite part of soda bread is the contrast of the thick crunch of the crust against the soft, biscuity interior.  With round loaves, you get mostly soft interior, and not much crust; but when you shape the dough into logs, you get a far higher crust-to-inside ratio.

This means that each bite has some of the coveted crunch and barely caramelized exterior so beloved and characteristic of soda breads.  Also, with a baguette-sized loaf, you can actually cut manageably small slices, instead of having to deal with a giant farl in addition to whatever you’re serving the hearty stuff with.

As for the overall flavor, this is one truly excellent brown soda bread.  The dough is neither too wet nor too dry to shape, and isn’t too fussy to mix together.  Best of all, the flavor is gorgeously balanced, with just the perfect amount of sweetness, and the texture is grainy without being sawdusty.  It’s rustic, crunchy, incredibly good, and is absolutely going in the permanent file.

soda-bread-1

Brown Soda Bread “Baguettes”
Adapted from Downey’s, Santa Barbara, CA, via Gourmet Magazine
Makes 2 loaves

11½ ounces (about 2½ cups) whole wheat flour
6 ounces (about 1 1/3 cups) unbleached all-purpose flour, plus extra for dusting
2 tablespoons packed brown sugar
1 teaspoon baking soda
1 teaspoon salt
1 stick (1/2 cup) unsalted butter, softened and cut into pieces
1¼ cups well-shaken buttermilk, at room temperature
1 large egg, at room temperature, lightly beaten

1.  Preheat the oven to 425° F, positioning a rack in the middle.  Lightly flour a large baking sheet, or line with parchment paper.

2.  In a large bowl, whisk together the flours, sugar, baking soda, and salt.  Add the butter, and cut in with a pastry blender or fingertips until the mixture resembles coarse meal.

3.  Quickly and gently, stir in the buttermilk and egg until a smooth dough forms.  Turn out onto a lightly-floured surface, and divide into 2 even pieces.  Pat each piece into a long, thin log and transfer to the prepared baking sheet.  Generously sprinkle with flour, and cut 3 diagonal shallow slashes on each loaf with a sharp serrated knife.

4.  Bake at 425° F for 30 minutes, then reduce the temperature to 375° F and continue to bake until a wooden pick or skewer inserted into the center of a loaf comes out clean, 15 to 20 minutes longer.  Transfer loaves to a wire rack to cool slightly before serving warm.


Notes:
1.  This bread is best the day it is made, but loaves can be tightly wrapped in foil and frozen for up to 1 month.  Reheat wrapped in foil in a 325° F oven, until heated through, about 15 to 20 minutes.

2.  When in doubt, remove the bread from the oven on the early side.  They will overcook easily, and become dry.

Posted in Quick Breads, Savory | Leave a comment

Caramelized Garlic Bread

Week Forty-Five: Potent or Unusual Flavors

garlic-2

Fair warning: this bread is inedible.

That said, this recipe could be tweaked to produce an edible bread; in fact, the bread part of the loaf is quite delicious.  But with the garlic filling, it’s absolutely, entirely, totally not even possible to choke it down.  And this from a girl who thinks 40 Clove Chicken is for the milquetoast and faint-hearted.

I concocted this bread based on two pictures, an ingredient list, and some laconic descriptions of a loaf made by Brasserie Bread, in Australia.  (It’s not quite the ideal method for recipe development, but it’s one that has proved adequate enough in the past.)  I knew only that it involved the titular “caramelised garlic”, is supposed to be one of the bakery’s more famous creations, and sounded absolutely incredible.

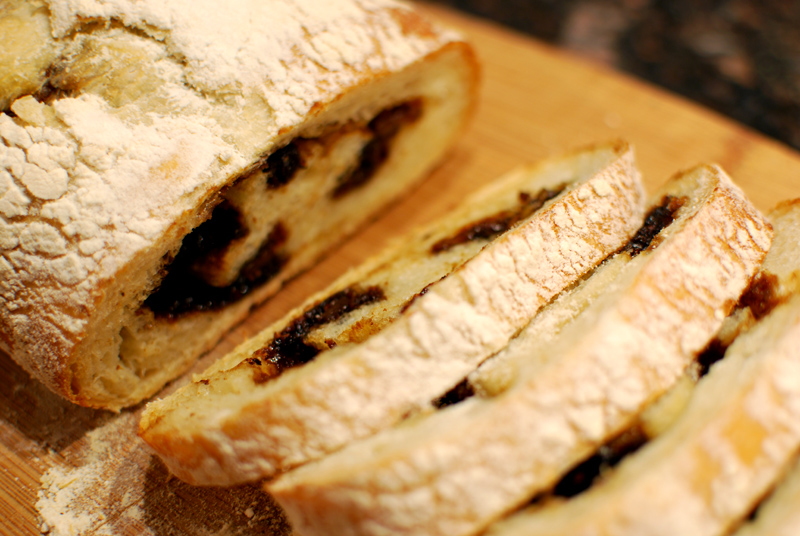
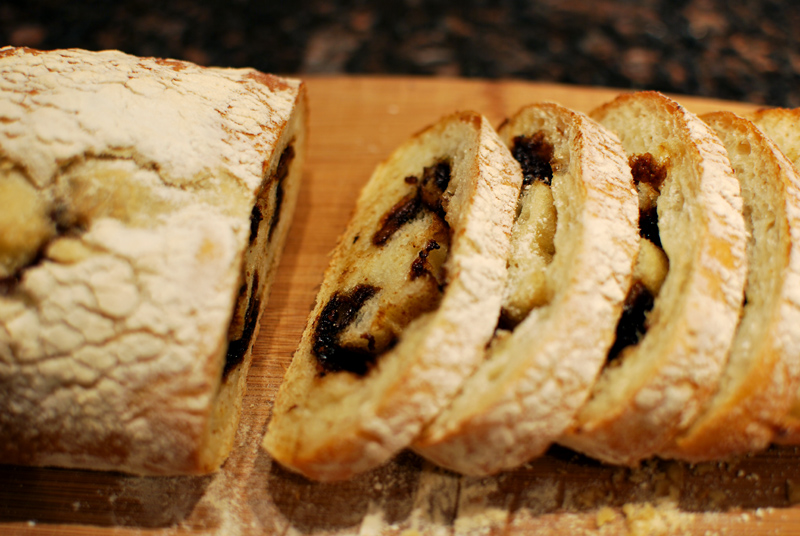
Judging from the way the loaf slumped in the photographs, I could tell it was made with a wet dough, one that would produce an open-textured, crisp-crusted bread.  But the most befuddling part was, of course, the crux of the bread, the caramelized garlic.

There’s two ways to caramelize something like garlic.  One is to add sugar to the garlic, and cook until the sugar turns into a caramel syrup around it.  The other is to actually caramelize the natural sugars in the garlic, by cooking over low and slow heat, as when you caramelize onions.  The vague accounts of this bread were helpful enough to suggest the former, by saying that “whole garlics are caramelised in a sugar syrup with balsamic vinegar and cracked black pepper corns.”

But how were these “whole garlics” prepared before cooking with this sugar syrup?  Blanching garlic is common, and supposedly removes bitterness before cooking, so I elected to try such a method.  This seemed to work well enough, but I charred the little darlings while cooking them in the syrup, made up only of balsamic vinegar, brown sugar, and a bit of olive oil.  Despite a bit of blackened flavor, they ended up tasting good, but they also tasted incredibly strong.  I wasn’t aware that garlic could taste so… garlicky.

Thinking that there was no way any human could take a bite of one of these cloves and survive intact, I chopped them up, to more evenly distribute them throughout the bread.  But then, for reasons unknown even to myself, I added the entire head of caramelized garlic to the dough.  The whole thing.

Maybe I thought that by chopping them, somehow the potency would be reduced, or perhaps just spread it more evenly rather than bursts of truly overwhelming flavor; but that clearly didn’t happen.  No, even the bits of bread that had not touched the garlic tasted of nothing else, though the texture was spot-on.  It was all rather sad.

This bread was not a total failure, as it marked the first time I’ve tried one of the excellent recipes from the lauded Artisan Bread in Five Minutes a Day; I don’t think I need to remind you that the dough itself was the only saving grace of this disaster.  And the aroma in the house was actually quite mouth-watering, if strong.  But unless you regularly go through entire heads of roasted garlic in single sittings, I’d skip the filling on this one.

garlic-1

Caramelized Garlic Bread
Adapted in part from Artisan Bread in Five Minutes a Day, by Jeff Hertzberg and Zoe Francois
Makes 1 loaf

For the dough:
9 ounces (2 cups) unbleached all-purpose flour, plus extra for dusting as needed
1½ teaspoons yeast
1½ teaspoons kosher salt
1 teaspoon sugar
1 cup water
1 tablespoon olive oil

For the caramelized garlic:
1 head garlic, separated into cloves and peeled
2 tablespoons brown sugar
2 tablespoons balsamic vinegar
1 tablespoon olive oil
2 teaspoons whole black peppercorns, crushed

1.  To make the dough, whisk together the flour, yeast, salt, and sugar.  Add the water and olive oil, and mix until smooth and all flour is moistened.  Cover well, and let sit at room temperature for about 2 hours.  Transfer the dough to the refrigerator, where it should sit for at least 12 hours and up to 12 days.

2.  When ready to continue, remove the dough from the refrigerator and let sit at room temperature while you make the caramelized garlic.  Place the peeled cloves in a small saucepan and cover with water.  Bring to a boil, and cook for 5 minutes.  Drain the garlic, and chop into smaller pieces if desired.  In a flat pan, combine the blanched garlic, sugar, vinegar, and olive oil.  Cook over medium heat until syrupy and thick.  Remove from heat, add the crushed peppercorns, and let cool to room temperature.

3.  Sprinkle a baking sheet with cornmeal, or line with parchment paper.  To make the bread, turn the dough out onto a floured work surface.  Flour the top, and gently press into a flat rectangle, being careful not to deflate it too much.  Drop or spread the garlic evenly across the surface of the dough.

4.  Starting with a long side, roll the dough up jelly-roll style into a long cylinder, pinching the seam to seal.  Transfer the roll to the prepared baking sheet, seam-side down.  Tuck the ends underneath, for a more even shape.  Dust liberally with flour, cover loosely with plastic wrap, and let rise at room temperature for 30 to 60 minutes, or until doubled in size.  Dough is fully risen when an indentation remains in the side after prodding gently with a fingertip.  Preheat the oven to 450º F, with a baking stone if possible.  Place a rimmed pan (cast iron is ideal, but any pan will do) in the oven to heat also.  Meanwhile, heat 1/2 cup water to just simmering.

5.  When fully risen, quickly slash the loaf with a sharp serrated knife 3 to 4 times, letting only the weight of the blade press into the dough.  Pour the heated water into the hot pan in the oven, and place the dough on the baking stone.  Bake at 450º F for about 30 minutes, or until golden brown and fully cooked.  Transfer to a wire rack to cool thoroughly before slicing.

Notes:
1.  Again, this bread is inedible when made as written.  Not even joking.

Posted in Savory, Yeast Breads | 3 Comments

Honey Wheat Black Bread

Week Forty-Five: Potent or Unusual Flavors

honey-wheat

Today’s bread is one of those dark, slightly grain, soft-crusted, and boldly sweet types that people either can’t get enough of, or could care less about.  Personally, I fall into the latter category, preferring a more savory bread.  (Funny  how little of a sweet tooth I have, considering how much I love to bake.)

But as sweet as this bread is, it has a lovely earthy flavor, the copious amount of honey removing any trace of bitterness from the cocoa powder and coffee used in the dough, and leaving only their richness and depth.  Just barely nutty from the whole wheat flour, the predominant flavor is one of the complex sweetness of whole grains and honey, not the shrill saccharine of a cake.

The crumb is even and tender, with an appropriate lack of gaping holes, though it is by no means dense.  Yes, this bread is soft, and I will always choose a harder crust, but it’s a well-balanced example of its breed.  Robust and dark, it’s a good recipe to have on hand, even if it’s not always what I’d prefer.


Honey Wheat Black Bread
Adapted from King Arthur Flour
Makes 8 small loaves

8½ ounces (a scant 2 cups) unbleached bread flour
6½ ounces (about 1½ cups) white whole wheat flour
4½ ounces (1 cup) regular whole wheat flour
1 tablespoon unsweetened cocoa powder
2 teaspoons instant coffee
2¼ teaspoons instant yeast
1½ teaspoons salt
1½ cups water, at room temperature
1/2 cup (6 ounces) honey
2 tablespoons olive oil

1.  In the bowl of a stand mixer, whisk together the flours, cocoa, coffee, yeast, and salt.  Add the water, honey, and olive oil.  Using the dough hook, mix at low speed until a rough dough forms.  Increase the speed to medium-low, and continue kneading until smooth and supple, about 10 minutes.

2.  Transfer the dough to a large, lightly oiled bowl.  Cover tightly with plastic wrap, and let sit at room temperature until doubled in size, about 1 hour.

3.  Lightly grease a large baking sheet, or line with parchment paper.  Turn the dough out onto a lightly floured work surface, pressing gently to deflate.  Divide the dough into 8 even pieces.  Shape each piece into a small log-shaped loaf, dusting with flour as needed to prevent sticking.  Transfer each piece to the prepared baking sheet, and cover loosely with lightly oiled plastic wrap.

4.  Let rise at room temperature for about 1 hour, or until they look puffy, but are not quite doubled in size.  Thirty minutes before baking, preheat the oven to 400º F, and position a rack near the middle of the oven.

5.  When fully risen, quickly slash the loaves once lengthwise with a sharp serrated knife or razor blade, letting only the weight of the knife press into the dough.  Bake at 400º F for 20 to 25 minutes, or until the loaves appear slightly darker on the top.  An instant-read thermometer should register around 200º F when inserted into the center of a loaf.  Remove to a wire rack to cool before serving.


Notes:
1.  This bread stays moist for at least four days at room temperature, in an airtight container.  If you prefer a less sweet bread, cut the honey to 1/4 cup; but the bread won’t stay moist as long.

Posted in Savory, Sweet, Yeast Breads | Leave a comment

Blue Cheese Bread

Week Forty-Five: Potent or Unusual Flavors

blue-cheese

When I decided on the theme for this week, I knew I had to include blue cheese somehow.  What more potent flavor could you add to bread?  I’ll admit, I merely like blue cheese; I don’t have that unbounded adoration that its many devotees do.

I do, however, love the singular and pungent aroma it exudes, and I don’t think there’s a better-smelling bread that I’ve made this year.  The aroma that fills the kitchen is not only one of baking bread, excellent as that alone is, but also of the unmistakable punch of blue cheese, gloriously and unashamedly stinky.  It’s heavenly. 

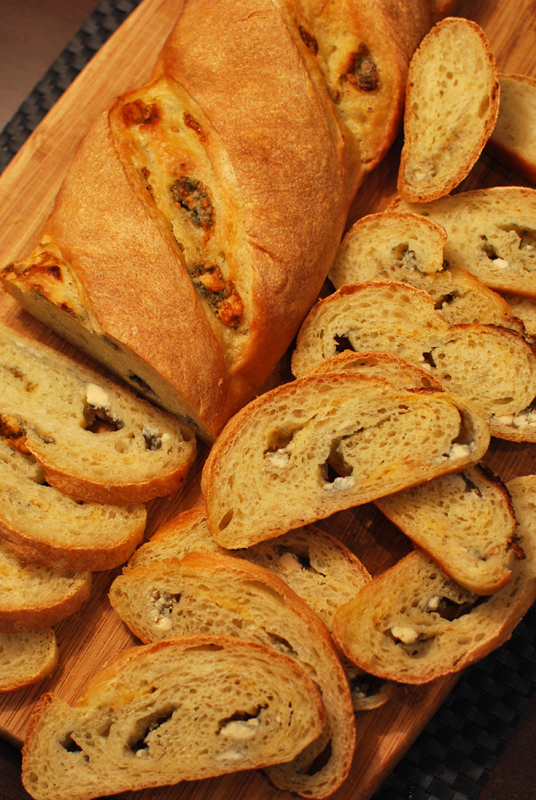
To help the cheese spread more evenly and melt into the dough, and add a bit of wholly unnecessary richness, I’ve mixed the cheese with a bit of butter.  Surrounding this indulgent mixture is a relatively lean dough, one that would produce a reasonably airy and crisp-crusted loaf if baked alone.  But with butter and blue cheese rolled up inside, the baking bread soaks up the melting fat, and transforms into something truly luxurious.  The sides of the bread, near the decorative slashes, grow darker and shiny with the runoff, in a most attractive way.

Though this bread is certainly good enough eaten sliced and plain, I had to try a piece toasted with my dinner, a simple fried egg over brown rice.  In a fried egg, I like my yolks runny, as I take great pleasure in dipping hard-toasted bits of bread in the center, letting the remainder run over the plate like a Hollandaise.  And over the course of this year, I have enjoyed many a crunchy crust covered with the golden stuff.

But this, this toasted bit of flour and water and butter, this unmistakable potency of blue cheese, dripping with the shining liquid yolk, it was provocative and rich.  The bite of the crust, flaking off crumbs, and the softness of the cheese, with the saucey and lush yolk, was nearly relevatory.  The smell had won me from the start, but this one taste was enough to make me a devotee.


Blue Cheese Bread
Makes 1 loaf

For bread dough:
17 ounces (about 3 3/4 cups) unbleached all-purpose flour
2 teaspoons instant yeast
2 teaspoons sugar
1 teaspoon salt
1½ cup water, at room temperature
2 tablespoons olive oil

For cheese filling:
5 to 6 ounces blue cheese, at room temperature
4 tablespoons unsalted butter, at room temperature

1.  To make the dough, whisk the flour, yeast, sugar, and salt together in the bowl of a stand mixer.  Add the water and oil.

2.  Using the dough hook, mix at low speed until a rough dough forms.  Turn off the mixer, and without removing hook or bowl, cover loosely with plastic wrap and allow to sit for 15 to 20 minutes. 

3.  After resting, increase the speed to medium-low, and knead for 5 to 6 minutes, or until the dough is supple and elastic.  Add additional flour or water as needed, if the dough looks very wet or crumbly.  The dough should clear the sides of the bowl. 

4.  Transfer the dough to a lightly-oiled bowl, cover with plastic wrap, and let rise in a warm place for about 1 to 1½ hours, or until doubled in size.

5.  While the dough rises, make the filling by blending (either by hand or in a mixer or food processor) the softened cheese and butter together in a bowl until combined, but not necessarily smooth.  Set aside.

6.  Lightly dust a baking sheet with cornmeal.  Turn the dough out onto a floured surface, and press into a rough rectangle as bit as the dough will allow, using flour as needed to prevent sticking.  Evenly dot the surface of the dough with the cheese mixture, leaving a 1/2 inch border.

7.  Starting with one long side, carefully roll the rectangle up jelly-roll style, brushing off any excess flour from the underside of the dough.  Pinch the seam gently to seal, transfer to the prepared baking sheet, seam-side down, and tuck the loose ends underneath for a more finished look.  Cover loosely with lightly-oiled plastic wrap and let rise at room temperature until doubled in size, about 1 hour.  Thirty minutes before baking, preheat the oven to 400º F.

8.  When fully risen, and using a sharp serrated knife or razor blade, make several quick, diagonal slashes in each loaf, letting only the weight of the knife press into the dough.  Spray or sprinkle the dough with water.  Bake at 400º F, spraying with water every 60 seconds for the first five minutes.  After five minutes, continue baking for another 25 to 30 minutes, or until well-browned.  Let cool thoroughly on a wire rack before cutting.


Notes:
1.  You can use whatever sort of blue cheese you like, but the flavor will be predominant, so it helps to use a fairly good one.

2.  It’s important to let the bread cool completely before cutting, to give the melting cheese and the structure of the bread to set.  Cut too early, and the escaping moisture (steam) will turn your bread gummy.

Posted in Savory, Yeast Breads | Leave a comment

Spicy Peanut Bread

Week Forty-Five: Potent or Unusual Flavors

peanut-1

I have not always had the best luck with peanuts in bread, though there have been exceptions.  When I saw this recipe, I knew I wanted to try it, but I had no idea what sort of creature would result.  I found this one on Heidi Swanson’s wonderful 101 Cookbooks, where it was described as “unique”.

Hmmm.

Thinking logically, I knew the dough was mostly composed of coconut milk (which would surely tenderize with its relatively high fat percentage) and home-toasted and -ground peanuts (which would certainly shorten any forming strands of gluten, making for a dense bread).  But how much these two things would affect the otherwise-standard dough, I wasn’t sure.

Beneath the uncertainty and misgivings, however, lay the intrigue of heady Indian curries, full of coconut milk, peanut, and spice.  Still as enamoured with those sultry dishes as I ever was, I didn’t care what the result might be; I wanted to taste this bread.

To encourage gluten development and make a fluffier bread — a just concern with all the whole-wheat flour and those nubbly bits of ground peanut —  I decided to add some vital wheat gluten.  Not actually gluten itself, which is only formed after mixing certain flours with water, vital wheat gluten is the protein-rich part of wheat flour that remains after rinsing most of the starch away.  Adding a spoonful or two to whole-grain dough is an excellent way to avoid the dense and flat fate that plagues many of that sort of bread.

Additionally, to help form a harder crust, I replaced some of the coconut milk with water.  The fat content of coconut milk (generally around 10%) would contribute to a softer crust, but cutting it with water, or even using light coconut milk (around 5% fat) creates a more crisp exterior.  Decreasing the fat percentage also helps strengthen the structure of the dough, as fat literally shortens the gluten strands (hence the word “shortening”).

peanut-2

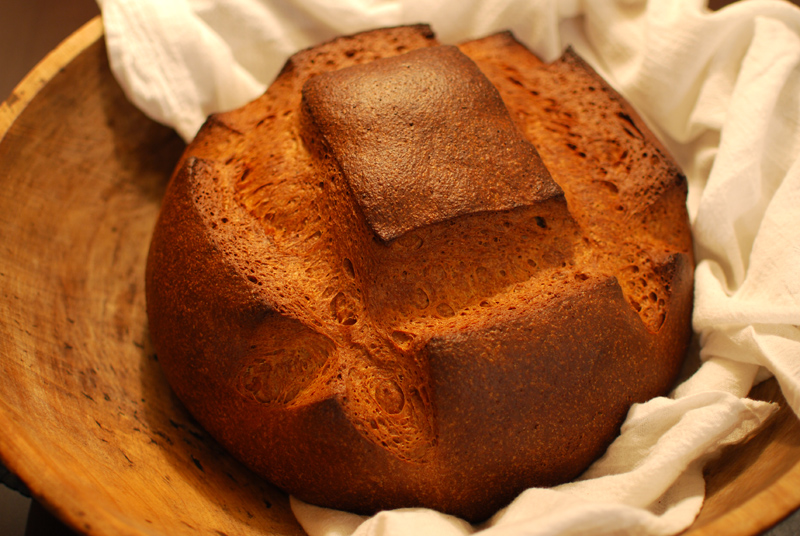
The dough rose very well, and was very supple and easy to work with, despite being a little on the stiff side.  And the oven spring was just amazing!  This wound up being a truly huge loaf of bread.  Ms. Swanson claims you can bake this in a 9 x 5 inch loaf pan, but I’d be shocked if you could fit all that bread in one pan.  Me, I chose to bake it freeform, as the dough was sturdy enough that it didn’t need a pan, and I love the sight of a rustic boule emerging from my oven.

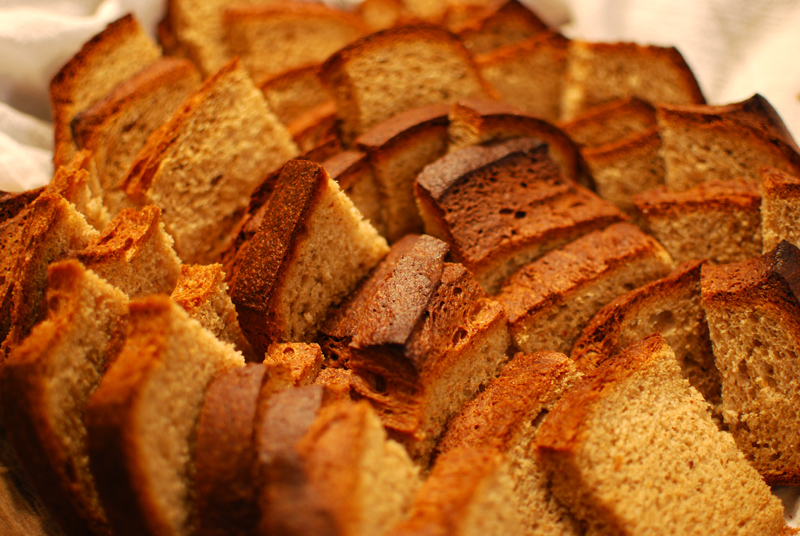
Noticed at once was how incredibly easy this behemoth was to cut through.  Such giant breads are usually tricky to slice, as the hard crust and typically soft and open crumb make for a difficult cutting scenario.  But here, the semi-hard crust was supported by a dense structure of incredibly tender bread, and was quite easy to slide a knife through.

And when I say the interior was incredibly tender, I mean it.  It was nearly as soft as many quick breads I’ve made, and had a similarly close structure.  The overall flavor was of course full of peanut, but the coconut milk gave it a tropical note; it was far more pad thai than pb&j.  But surrounding that was the sweetness of paprika and the smokiness of cumin, set off by just enough warming cayenne to let you know it was there.

All in all, it was a very good bread; perhaps not the ideal example of a crisp-crusted, airy artisinal loaf, but the excellent flavor goes a long way towards making up for a slightly unexpected texture.  This recipe was a great experiment, one that resulted in the knowledge that peanuts can, like many other foods, make great bread as often as not.  Unusual, delicious, and fragrant, sure.  But unique?  Overwhelmingly so, and in the best possible way.

peanut-3


Spicy Peanut Bread
Adapted from 101 Cookbooks
Makes 1 loaf

1½ cup raw peanuts (see note 1 below)
1 teaspoon paprika
1/4 teaspoon cayenne pepper
1/4 teaspoon dried oregano
1 teaspoon whole cumin (or 1/2 teaspoon pre-ground)
1 cup coconut milk
3/4 cup water, at room temperature
4 tablespoons unsalted butter, melted and cooled slightly
3 tablespoons honey
11½ ounces (about 2½ cups) unbleached all-purpose flour
11 ounces (about 2½ cups) whole-wheat flour
2 tablespoons vital wheat gluten
2 teaspoons instant yeast
1 teaspoon salt

1.  In a large sauté pan over medium heat, toast the peanuts for 2 to 3 minutes, or until they turn golden and fragrant.  Add the paprika, cayenne, and oregano (and pre-ground cumin, if using), and toast for 20 to 30 seconds.  Remove from pan to a large bowl or flat plate to cool slightly.  If using whole cumin, toast in pan over medium heat until fragrant, about 1 minute.  Grind in mortar and pestle, or in a spice grinder.  Add to peanuts.

2.  Transfer peanuts to a blender or small food processor, and purée until a smooth paste forms, scraping down the sides as needed. 

3.  When smooth, scrape peanut butter into the bowl of a stand mixer.  Gradually whisk in the coconut milk and water until blended.  Add the butter and honey, and whisk to combine.  Add the flours, wheat gluten, yeast, and salt.  Using the dough hook attachment, mix at low speed until a rough dough forms.

4.  Increase the speed to medium-low and continue kneading, scraping the bowl as necessary, until the dough becomes smooth and supple, about 5 minutes.  Turn out onto a lightly-floured work surface, and shape into a ball by pulling and tucking the sides into the center.  Place seam-side down in a large, lightly-oiled bowl.  Cover tightly with plastic wrap, and let sit at room temperature until nearly doubled in size, about 60 to 90 minutes.

5.  Lightly grease a large baking sheet, or line with parchment paper.  Turn the dough out onto a work surface, using flour if needed to prevent sticking.  Deflate the dough by pressing gently, and shape again into a round ball by pressing the sides into the center.  Transfer to the prepared baking sheet, seam-side down, cover loosely with plastic wrap, and let sit at room temperature for 45 to 60 minutes, or until doubled in size.  Preheat the oven to 450º F.

6.  When the bread is fully risen, using a sharp serrated knife, quickly and decisively slash the top decoratively, letting only the weight of the knife press into the dough.  Spray or sprinkle the dough with water, and place in the oven.

7.  Bake at 450º F for 10 minutes, spraying with water every 30 seconds for the first 2 minutes.  After 10 minutes, lower the temperature to 400º F and bake for an additional 30 to 45 minutes, or until very well browned and baked through.  An instant-read thermometer should register about 200º F when inserted into the center of the loaf.  Remove the bread to a wire rack to cool thoroughly before slicing.


Notes:
1.  If you can’t find raw peanuts, roasted are okay; just be sure to adjust the pan-toasting time.  However, try to find un-salted nuts if at all possible, as the added salt will greatly affect the rising of the dough, and the flavor will be far too salty.

Posted in Savory, Yeast Breads | Leave a comment

Mimosa Biscuits

Week Forty-Five: Potent or Unusual Flavors

mimosa-2

In New Orleans, brunch is an altogether different beast than it is anywhere else I’ve lived.  I have a theory that it relates to the predominant Catholicism of the city, taking the whole “day of rest” thing a bit more seriously than other Americans, or maybe it’s that people are too hungry to cook after sitting through mass.

Whatever the case, the great love of food that unites all New Orleanians draws them together every Sunday afternoon to most every restaurant in the city.  The live jazz and complimentary (or better, endless) champagne at many establishments doesn’t hurt, either.  They gather, toasting with ubiquitous mimosas, over a boundless array of delicacies such as eggs Sardou, grillades and grits, or pain perdu, and always with the customary plate of biscuits, the only nod to the cuisine of the rest of the South around them.

Having spent Sunday upon Sunday of my younger days at such tables, I find the best brunches are those that include those two constants: mimosas and biscuits.  Both sunny and bright, they liven a meal; I can scarcely imagine anyone turning down either, much as I can scarcely imagine serving brunch without both.

So when I saw this recipe that unites the two, I obviously had to try it.  Make biscuits with a mimosa?  Sign me up!  I was a little concerned that they would come out tough, as biscuits are usually made with milk, which has a tenderizing and softening effect on baked goods.  But bolstered by my experiment with champagne bread earlier in the year, I was reasonably confident.  And hey, any reason to open a bottle of champagne is fine by me.

The finished biscuits were indeed barely (just barely!) tougher than typical biscuits, but they absolutely made up for it in personality.  Full of cheerful orange flavor, from both the orange juice and potent zest, they rose beautifully in properly flaky layers, and had a textbook crunch to the exterior.

I was well pleased with these biscuits.  They were fluffy, flavorful, and light, and will surely be making an appearance at the next brunch I host.  Though I might try adding a little powdered milk to the dough, for a bit of extra tenderness, either way it’s certainly going to be a good excuse to start pouring the drinks.  Now, if only I could find a way to make mimosas out of biscuits….


Mimosa Biscuits
Adapted from Latil’s Landing Restaurant, Darrow, Louisiana
Makes about 12

11 ounces (about 2½ cups) unbleached all-purpose flour, plus extra for dusting
4 teaspoons baking powder
2 teaspoons sugar
1 teaspoon salt
1 tablespoon finely grated orange zest (from 1 orange)
2½ tablespoons cold unsalted butter, cut into as small pieces as possible
1/2 cup cold champagne
1/2 cup cold orange juice (from 1 orange)

1.  Preheat the oven to 400º F.  Grease a large baking sheet, or line with parchment paper.  In a large bowl, whisk together the flour, baking powder, sugar, salt, and orange zest.  Add the cold butter, and cut into the flour by pinching with fingertips, or with a pastry blender.

2.  Add the champagne and orange juice.  Using a nonstick spatula or fork, quickly and gently toss until a rough dough forms.  Turn out onto a floured work surface, and dust the top liberally with flour.  Fold the dough in half, and dust with flour.  Press or roll the dough out to 1/2 inch in thickness.  Using a 2½ inch round cutter, cut as many biscuits as possible, being careful not to twist the cutter as you press down (this will pinch the edges and prevent the biscuits from rising as tall as possible).  Place biscuits on the prepared baking sheet.

3.  Bake at 400º F for 10 to 15 minutes, or until lightly browned.  Let cool slightly on the pan before serving warm.


Notes:
1.  If you don’t get quite 1/2 cup of juice from your orange, you can make up the difference with additional champagne, or water.

Posted in Quick Breads, Savory, Sweet | 3 Comments

Rye Walnut Nigella Rolls

Week Forty-Five: Potent or Unusual Flavors

rye-walnut

“November’s cold chain, made of wet boots and rain.”
(Tom Waits, “November”)

These days are dreary, tinged by the withdrawal and contracting of everything around.  Days shrink, plants and trees and animals curl into themselves, people huddle into coats and warm houses.  But appetites, alone amongst all these, expand and swell.  Spurred on by the vestigal lizard-brain, humans are not exempt from the animal instinct to feed, to pad ourselves with a most natural protection from the cold: our own bodies, made fat.

Gone are the young and tender salads of Spring, light broths now supplanted by robust stews, and the idea that one could sustain on dinners solely of crudités and bread laughable.  These are days of robust flavors, of tastes strong and pungent and novel enough to shock warmth down into the bones, where blankets never could remove a chill.

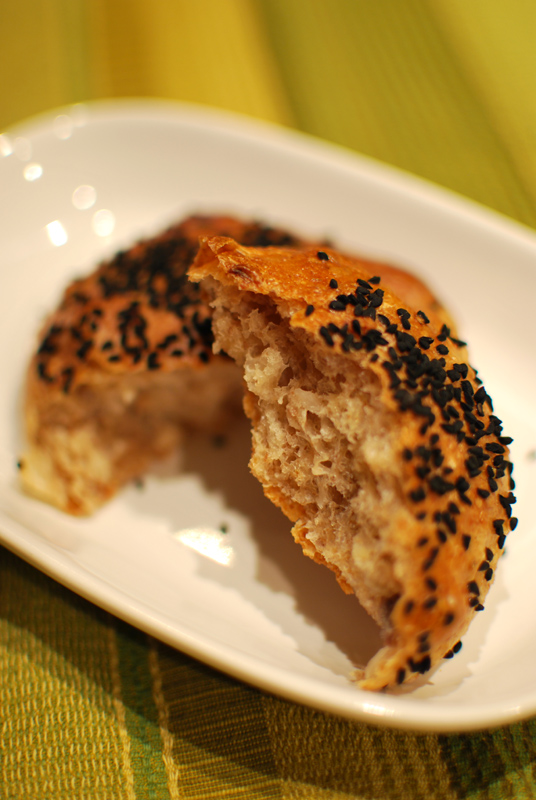
So are the breads for this week brought, full of unusual and brash flavors, with hopes that it is not the heat of the oven alone that will warm you.  The first is full of such warming foods, made with generous amounts of walnut, onion, and nigella seed.

Walnuts might not come to mind as a particularly heat-giving food, but they have long been regarded as such in Traditional Chinese Medicine.  They are said to nourish the blood, and strengthen muscles.  Onions have similar warming capabilities; their pungency is used to disperse chills and clear congestion.  And in addition to the spicy, mustard-hot flavor of  nigella seeds, it’s been said that they will “cure anything but death”.  What better to chase away the gloom of a November night than a tender roll filled with all these things?

Lest you think that these rolls are purely new-age health food, let me assure you that they taste nothing like the stereotype of “hippie food”, or any kind of mish-mash of things that happen to all be good for you (but taste dreadful together).  The crunch of a buttery walnut, with the distinctive flavor of rye flour and the softness of olive-oil-sautéed onion, is nothing short of a rich and luxurious pairing.  Adding the seductive flavor and pop of nigella seeds is the proverbial icing on the cake, as it rounds out each bite with a dusky heat.

These days are dreary outside; but inside your home, the fragrance of these rolls, freshly-baked, hanging in the air, speaks only of heat, and comfort, and curling into the joy of a small, warm bread on your plate.


Rye Walnut Nigella Rolls
Adapted from Gourmet Magazine
Makes 24 rolls

1 medium onion, chopped (about 1 cup)
1 tablespoon salt, divided
1/2 cup olive oil
1½ cups milk, at warm room temperature (100º to 105º F)
3/4 cup water, at warm room temperature (100º to 105º F)
1 tablespoon honey
24 ounces (about 5½ cups) unbleached all-purpose flour, plus extra for dusting
4½ ounces (1 cup) rye flour
1½ teaspoons instant yeast
1/2 teaspoon ground black pepper
3 ounces (3/4 cup) walnuts, toasted, cooled, and chopped
1 large egg beaten with 1 tablespoon water to make an egg wash
1/4 cup nigella seeds (see note 1 below)

1.  In a 10 inch skillet over medium heat, cook the onion with 1/4 teaspoon salt in the olive oil, stirring occasionally, until softened, 4 to 5 minutes.  Drain the onions in a sieve set over the bowl of a stand mixer.  Set onions aside, and stir the milk, water, and honey into the oil.

2.  In a medium bowl, whisk together the flours, yeast, pepper, and remaining salt (2 3/4 teaspoons).  Add to the wet ingredients in the mixer bowl.  Using the dough hook, mix at low speed until a rough dough forms, scraping the bowl as needed.

3.  Increase the speed to medium-low, and continue kneading until smooth and elastic, 5 to 6 minutes.  Adjust the consistency as needed with additional flour or water if it looks very wet or very dry.  Decrease the speed back to low, add the onions and walnuts, and mix until incorporated.  You may need to add a small handful or two of flour to help incorporate.

4.  Turn the dough out onto a floured work surface and shape into a round ball by tucking the edges into the center, dusting with just enough flour to prevent sticking.  Transfer to a lightly-oiled large bowl, and turn to coat the dough with the oil.  Place seam-side down, cover with plastic wrap, and let sit at room temperature until doubled in size, 1 to 2 hours.

5.  Lightly grease two large baking sheets, or line with parchment paper.  Turn the dough out onto a lightly-floured surface, pressing gently to deflate (do not knead).  Divide into 4 equal pieces, then divide each piece into 6 pieces (for a total of 24).

6.  Keeping unused pieces covered, roll each piece of dough into a ball by cupping your hand and pushing dough against work surface as you roll in a circular motion.  Arrange rolls 2 inches apart on a baking sheet.  Cover loosely with a kitchen towel (not terry cloth), or lightly-oiled plastic wrap.  Repeat shaping with remaining pieces of dough.  Let sit at room temperature until doubled in size, 1 to 1½ hours.  Thirty minutes before baking, preheat the oven to 400º F, and position racks in upper and lower thirds.

7.  When fully risen, gently brush rolls with egg wash and sprinkle with nigella seeds.  Bake at 400º F for 10 minutes, then rotate and switch positions of sheets.  Continue baking until golden brown, 10 to 15 minutes longer.  Transfer rolls to a wire rack to cool at least 20 minutes before serving.


Notes:
1.  Nigella seeds may be found in Indian or Middle Eastern groceries, and might be called Black Cumin or Onion Seed.  If you cannot find them, poppy seeds make a reasonable substitute.

2.  These rolls are best the day they’re made, but can be frozen (cool completely, then wrap well) for up to 1 month.  Reheat in a 350º F oven until warmed through, about 10 minutes.

Posted in Savory, Yeast Breads | Leave a comment

Pumpkin Chocolate Bread

Week Forty-Four: Multi-Grain Breads Happy Halloween!

pumpkin-chocolate

I love Halloween.  I’ve always enjoyed any excuse to dress up in costume, giving sides of myself usually kept under wraps a chance to emerge a bit, under the protective hand of “staying in character”.  Maybe it’s a result of growing up in New Orleans, where people don costumes just because it’s Tuesday, but I’m always a little happier when I have a Halloween costume planned.

It’s in this spirit that I bring you today’s bread.  Pumpkin must be one of Fall’s more virtuous foods, with its wealth of nutrients, its endless adaptability in the kitchen, and not least of all its ability to remain delicious after the commerical canning process.  But for today, pumpkin sheds her wholesome and respectable air, and puts on a more scandalous costume.

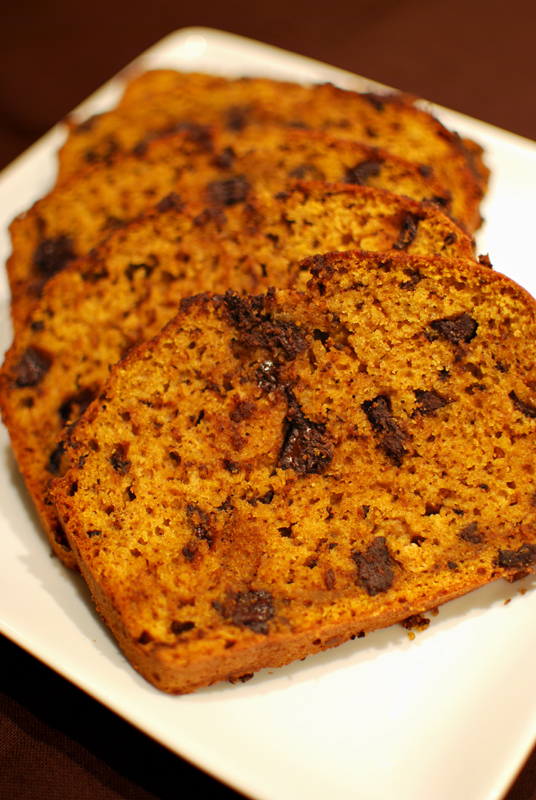
It’s one that is sweet and indulgent, studded with dark chocolate, and fragrant with heady spices.  Each crumbling slice tenderly falls apart in your hand, and the fantastic flavor will have you diving to catch any piece that may fall before it hits the floor, lest you have to throw any mote away.

This bread was suggested some months back by a friend who insisted I save some for her, should I make it, describing it as her all-time favorite bread.  I’ve been planning it ever since then for this one day, as it seemed the only appropriate choice.  (Do I have to mention the color scheme?)  Oddly, I don’t think I’ve ever had pumpkin chocolate bread before; Autumn baking tends to be either pumpkin or chocolate, not both.

But the result is earthy, rich, spicy, a little mysterious, and just plain fabulous.  The sweet-savory flavor of pumpkin, paired with the bitterness of a good dark chocolate, is both potent and elegant.  But with generous measures of cinnamon and ginger added to the mix, it becomes eye-rolling good, conjuring haunting notes of Thanksgiving pies and Mexican chocolate.  No, this isn’t the pumpkin I know on every other day of the year; but if this is the sort of costume she puts on, I might have to throw more costume parties.


Pumpkin Chocolate Bread
Adapted from The Art and Soul of Baking, by Cindy Mushet
Makes one 9 x 5 inch loaf

10 ounces (about 2¼ cups) unbleached all-purpose flour
3/4 teaspoon baking soda
1/2 teaspoon ground cinnamon
1/2 teaspoon ground ginger
1/4 teaspoon ground allspice
1/4 teaspoon ground cloves
1/4 teaspoon salt
2 large eggs, at room temperature
1/3 cup water
1½ cups (packed) brown sugar
9 ounces (1 cup) canned pumpkin purée
1/4 cup vegetable oil
1/4 cup applesauce
1 teaspoon vanilla extract
1 teaspoon bourbon (optional)
5 ounces (about 1 cup) good quality chocolate, chopped

1.  Preheat the oven to 350º F, and position a rack in the center.  Butter a 9 x 5 inch loaf pan, and line lengthwise with a piece of parchment long enough to extend one inch beyond the sides of the pan.

2.  In a medium bowl, whisk together the flour, baking soda, spices, and salt until thoroughly blended.  In a large bowl, whisk the eggs and water together.  Add the sugar, and whisk until blended.  Mix in the pumpkin, oil, applesauce, vanilla, and bourbon.

3.  Add the flour mixture to the wet ingredients, and fold together with a nonstick spatula until nearly blended.  Add the chocolate, and gently fold in until incorporated and no large pockets of flour remain.

4.  Scrape the batter into the prepared pan, and smooth the top.  Bake at 350º F for 55 to 65 minutes, or until golden brown and feeling firm when pressed gently in the center.  Remove from the pan by pulling on the parchment, loosening the bread from the sides of the pan with a thin knife if necessary.  Discard the parchment, and let cool thoroughly on a wire rack before slicing.


Notes:
1.  Chocolate chips are perfectly acceptable, but I prefer the irregular pieces and melting quality of chopping up my own bar.

2.  For the best slices, let the bread cool completely before cutting, giving the melted chocolate a chance to cool, and the structure of the bread to set.

3.  This bread will keep for about 2 days at room temperature, wrapped in plastic, or may be frozen, tightly wrapped.

Posted in Quick Breads, Sweet | Leave a comment

Seeded Multi-Grain Bread

Week Forty-Four: Multi-Grain Breads

seeded-multigrain

I’m not really sure what to write about this bread.  See, the original recipe is one of those multi-day, sourdough-starter-already-made recipes that can’t help but produce a good bread.  And since this bread is made entirely from whole-wheat and rye flours – two flours notoriously difficult to use alone in artisan style breads – such elaborate preparations are nearly requisite.

My issue, however, came from the fact that one of the ingredients for the starter was a starter.  You know, let me just pull out my appropriately-hydrated whole-grain starter.  That I have.

I’m sure there are gasps from the panary hardcore amongst you, my Dear Readers; but no, I do not keep starters in my fridge.  Not live ones, anyway.  And, okay, in fairness this recipe is from a book that I don’t personally own; I’m sure the recipe for this second-level starter is included therein.  Me, I work with what I got.

In addition to the jerry-rigged starter (or perhaps because of it), my dough didn’t rise quickly enough to accomodate my schedule, which resulted in less than ideal rising conditions (the half-proofed dough was shoved in the fridge as I ran out the door, to be later revived under a less than watchful eye).

It all seemed to be going well, despite the abuse, until I pulled it from the oven.  With practically no oven-spring, I’m still not sure if the fault was mine, or one inherent to the flours themselves.  All that aside, though, the bread wasn’t dense.  It wasn’t particularly airy either, but no surpise there from a whole-grain bread.

It did, however, have an odd flavor that I’m at a loss to pin down.  It was a decidedly sourdough taste, but either more potent or somehow different than what I’m accustomed to.  It wasn’t unpleasant, but it took me a few bites to wrap my brain around it.

Texture-wise, the crumb was as tender as you could possibly expect, with enough pull to remind you that this dough was cared for.  The crust was a bit thick and chewy, which I think could be remedied by baking this loaf in a covered pot, à la No-Knead Bread.

All in all, this bread was good, but not really great.  Take that with a grain of salt, though; you’ve seen that I hardly followed the original recipe.  If there’s anyone out there with a whole-grain starter, try it and let me know how it works out.  And please include your starter recipe.


Seeded Multi-Grain Bread
Adapted from Advanced Bread and Pastry, by Michael Suas, via Apple Pie, Patis, & Pâté
Makes 2 loaves 

For the starter:
2½ ounces (about 1/2 cup) whole wheat flour
1/8 teaspoon instant yeast
3 ounces (1/4 cup plus 2 tablespoons) water, at room temperature

For the soaker:
2½ ounces mixed seeds (see note 1 below), plus about 1/3 cup extra for finishing the loaves
3 tablespoons water, at room temperature

For the final dough:
8½ ounces (1 3/4 cups) whole wheat flour
5 ounces (1 generous cup) rye flour
2 teaspoons kosher salt
1 teaspoon instant yeast
9 ounces (1 cup plus 2 tablespoons) water, at room temperature

1.  Mix the starter ingredients together until a shaggy ball of dough is formed. Knead for about 2 minutes, or until smooth.  Place in a medium bowl, and cover with plastic wrap.  Let sit at room temperature for about 12 hours before using in the final dough.

2.  For the the soaker, mix 2½ ounces of mixed seeds (reserving the remainder) with the water in a small bowl.  Cover and let stand at room temperature for at least 2 hours before using in the final dough.

3.  For the final dough, whisk together the flours, salt, and yeast.  Add the water and all of the starter.  Using the dough hook, mix at low speed until a rough dough forms.  Increase the speed to medium-low, and knead for 8 to 10 minutes, or until smooth and elastic, and the gluten network is well-formed.

4.  Add the soaker, and knead until evenly incorporated, 1 to 2 minutes.

5.  Transfer the dough to a large, lightly-oiled bowl.  Cover tightly with plastic wrap, and let rise at room temperature until increased 1½ times in size, which may take anywhere from 2 to 4 hours, depending on the strength of your starter.

6.  Lightly grease a baking sheet, or line with parchment paper.  Turn the dough out onto a lightly-floured surface, and divide into two equal pieces.  Shape each piece into a round or oval-shaped loaf.

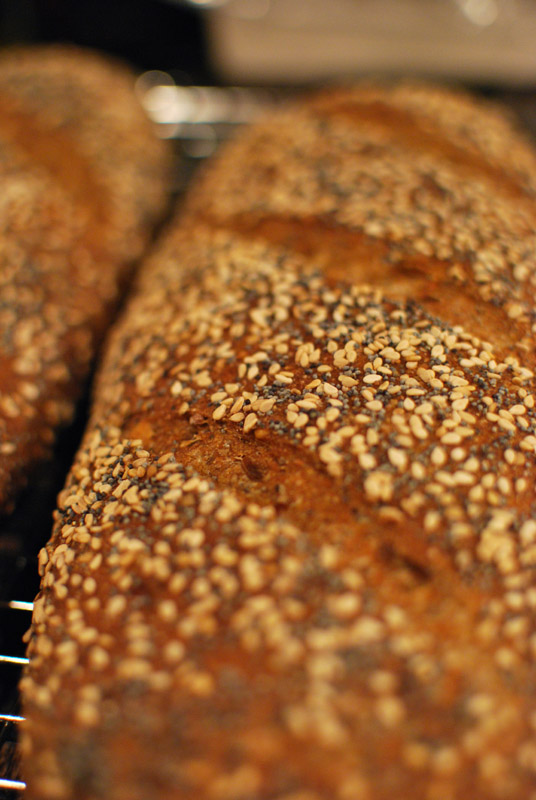
7.  Place the remaining mixed seeds on a flat plate.  Spray or brush the top of each loaf lightly with water, and roll in the seeds to coat.  Transfer to the prepared baking sheet, cover loosely with plastic wrap, and let rise at room temperature until nearly doubled in size, about 1 to 1½ hours.  Thirty minutes before baking, preheat the oven to 450º F.

8.  When fully risen, use a sharp serrated knife to gently and decisively slash each loaf 3 or 4 times diagonally, letting only the weight of the knife press into the dough.  Bake at 450º F for 30 to 35 minutes, rotating the loaves halfway through baking if necessary.  Transfer to a wire rack to cool thoroughly before slicing.


Notes:
1.  You can use any combination of seeds you like, such as flax, sesame, poppy, or millet, or even any cracked or rolled grains, such as oat or barley; just make sure it all adds up to 2½ ounces.  Due to such variation, the volume measurements will vary wildly, so the best way to properly measure this mixture is to weigh it.

Posted in Savory, Yeast Breads | Leave a comment

Kitchen Sink Crackers

Week Forty-Four: Multi-Grain Breads

kitchen-sink-crackers-2

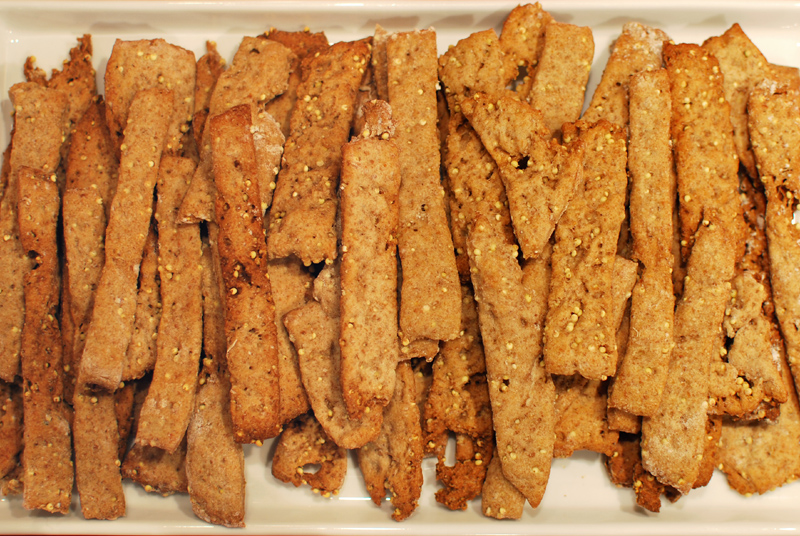
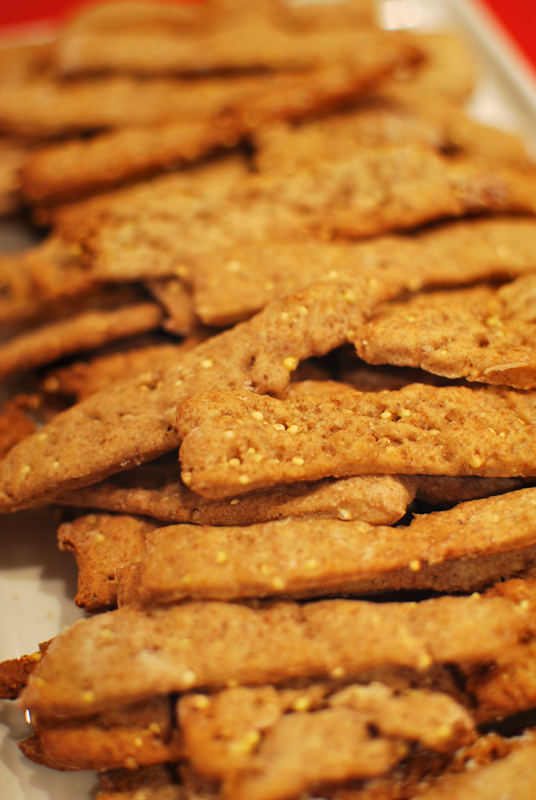
I love names like this.  Kitchen Sink Crackers.  It implies a friendliness in the recipe, one that says, “Go ahead, throw it in!  I can take it!”  It’s accomodating, a rare adjective in the baking world.  The version made here uses six different flours, but could be made with as few as two (why bother with just one?).  I’ve also added millet in, for that fabulous tiny pop it brings to every bite, and pretty dots of yellow throughout.

I was a little apprehensive that, with all the flours included, the overall taste would be rather muddy.  But what resulted was instead a lovely complexity, the various grains all blending together into a multi-layered and rustic flavor.  Though these are yeasted crackers, they aren’t given a second rise, but are baked immediately after rolling out.  Thus, they aren’t meant to be thick and chewy, but wafer-like and crisp.

My one problem with this recipe was also one of my favorite things about the recipe: the millet.  I adore millet in breads and crackers, but the round things actually prevented me from rolling the dough as thinly as I would ideally have wanted, making the finished crackers more thick and hearty than fragile and light.  This was not a bad state of affairs, but not what I had envisioned.

Another problem was that I used a pasta roller to make quick work of flattening the dough, but the millet caught in the opening, and the dough was just soft enough to tear whenever that happened.  So my crackers ended up with jagged edges and holes, which I thought was nevertheless appropriate for the grainy texture.  If you’re going for a cleaner look, try substituting sesame seeds instead of millet; they’re flatter, and therefore wouldn’t hinder rolling, but would still provide a nice crunch.  Alternatively, you could totally omit seeds, and use a bit of cornmeal in place of some flour, which would give a slightly similar crunchy texture.

The end result was a little more substantial than I originally wanted, but it works beautifully.  These crackers are full of stout flavor and texture (and a bit of nearly every flour I have).  The variations are, of course, endless; these agreeable little guys seem to be able to take anything you might throw at them.

Except maybe the actual kitchen sink.

kitchen-sink-crackers


Kitchen Sink Crackers
Adapted from The Professional Pastry Chef, by Bo Friberg
Makes about a million crackers

12 ounces (about 2½ cups) unbleached bread flour
4 ounces (1 scant cup) whole wheat flour
4 ounces (1 scant cup) rye flour (any sort)
2 ounces (a generous 1/2 cup) spelt flour
2 ounces (a scant 1/2 cup) teff flour
2 ounces (about 1/2 cup) rice flour (any sort)
1 tablespoon kosher salt (2½ teaspoons table salt)
2 teaspoons instant yeast
1 cup water
3/4 cup light-flavored beer
3 tablespoons vegetable oil (any sort)
1 tablespoon honey
1/2 cup millet

1.  In a large bowl, whisk together all the flours, the salt, and the yeast.  Add the water, beer, oil, and honey.  Stir together until a rough dough forms.

2.  Turn the dough out onto a work surface.  Knead until smooth, about 2 minutes, dusting with extra flour (of any sort) as needed to prevent sticking.

3.  Add the millet in small increments, and knead to incorporate evenly.  (You may find this easier to do in the bowl, to contain the millet as much as possible.)  When all the millet is added, return the dough to the bowl, cover with plastic wrap, and let rest at room temperature for 1 hour.

4.  Preheat the oven to 375º F, and position the racks near the middle of the oven.  Line as many baking sheets as you have with parchment paper, or just leave ungreased.

5.  Divide the dough into 4 pieces.  Lightly flour each piece, covering the unused pieces with a kitchen towel or plastic wrap, and roll out as thinly as possible, dusting with flour as needed to prevent sticking.  If you have a pasta roller, this is the time to use it.  If not, a rolling pin is fine.  If the dough resists while rolling, cover and let rest while working on the other pieces.

6.  Cut the rolled-out dough into desired shapes, and transfer to the baking sheets.  Bake at 375º F for 15 to 20 minutes, or until golden brown.  Transfer to a rack to cool thoroughly.


Notes:
1.  Crackers will keep, in an airtight container at room temperature, for about two weeks.

2.  The flours listed here are suggestions more than mandates; feel free to use whatever mixture of flours you like, as long as the total weight equals 26 ounces (volume measurements will vary by type of flour used; see here for a fairly comprehensive list of equivalents).

3.  Instead of millet, you can use whatever other small seed you prefer, or happen to have on hand (such as sesame or poppy seed).

Posted in Quick Breads, Savory, Yeast Breads | Leave a comment