Fontina Onion Sake Bread

Week Forty-Nine: Breads With Cheese

fontina-sake-1

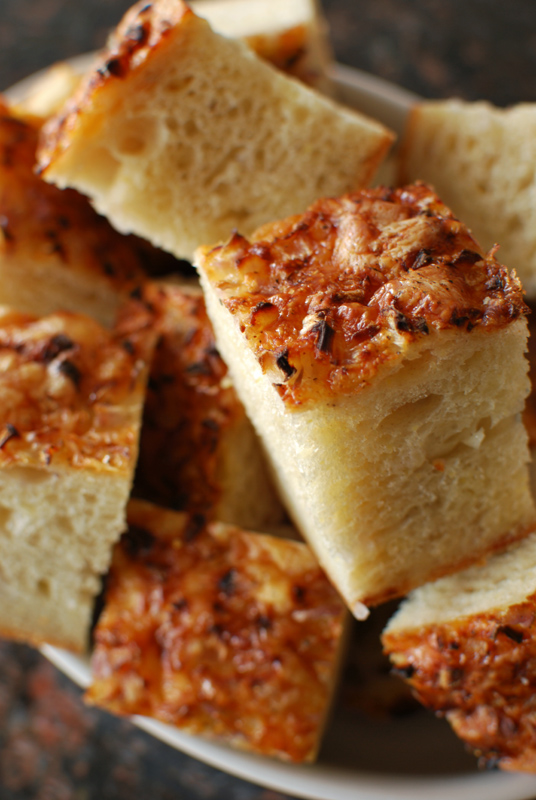
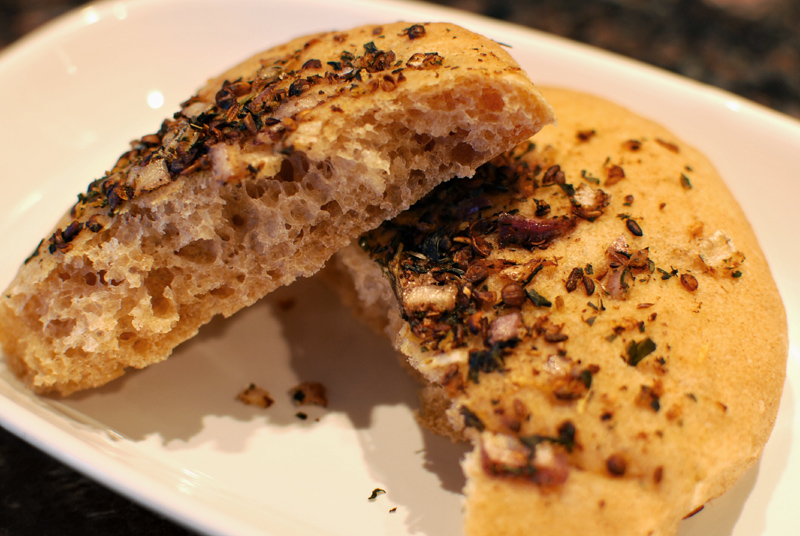
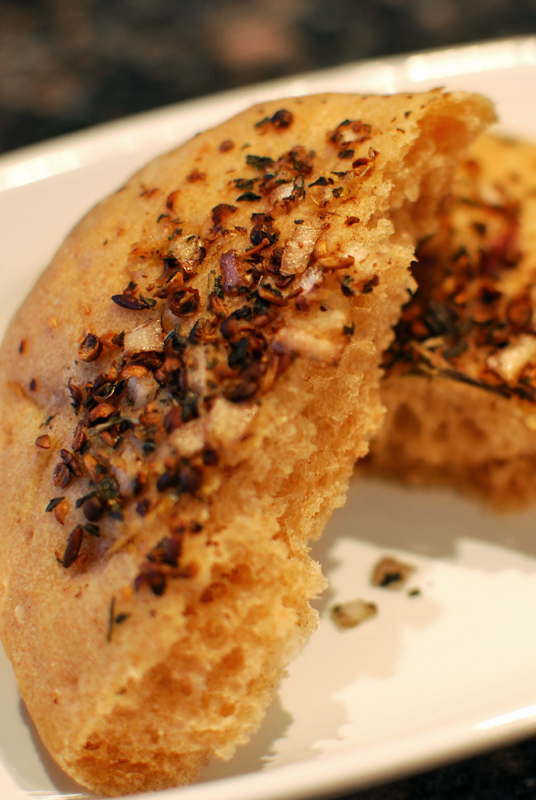
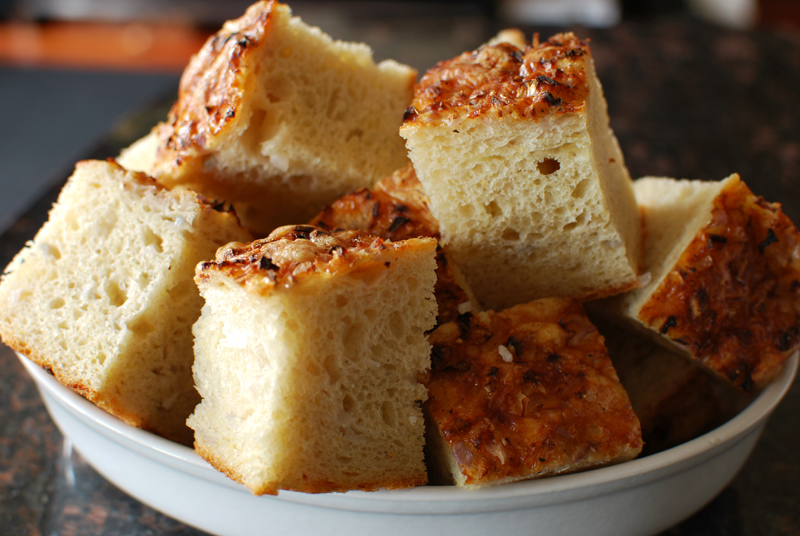
Today’s bread is styled somewhat like a focaccia; that is, it’s as fluffy and light as a good focaccia, but it lacks the heavy drenching of oil so common to the breed.  In its place is a flavorful cap of diced red onion, held on by a generous grating of fontina cheese.

The same cheese and onion are mixed into the dough, where they not only flavor every crumb, but also provide moisture, ensuring that the bread will stay tender and palatable for days.  The addition of sake to the dough brings a complex flavor, reminiscent of a long and slow rise, but without the investment of time usually necessary to achieve it.

If you’re hesitant to add sake, having tried and disliked the taste, let me reassure you that here, it provides much the same role that adding vinegar to a dough would.  It makes for a more elegant depth of flavor, rather than making the bread taste of anything in particular.  You personally might not drink a glass of sake, but neither would you drink a glass of vinegar.  And if you have leftover sake to deal with, don’t dare pour it out, as it makes a perfect cooking wine.  Or, you can send it to me.

On top of this loaf of bread, the topping of red onion caramelizes with the heat of the oven, its pungency transformed into a tart sweetness.  Paired with the nuttiness of fontina, which melts and cools into a crisp texture, and a hint of thyme, the loaf is deeply aromatic.  The softness of the interior gives way underneath the toothsome crunch of the crust, especially when a slice is toasted until just golden.

Though this bread is too soft for sandwiches, as focaccia is often used, you certainly won’t complain about having it with soups or stews.  If you happen to let any go stale, just cut it into cubes, toss with a little olive oil, and toast in a low oven until slightly dried for some of the best croutons you’ll ever see.  It would also be an excellent addition, cubed and dried, to any favorite stuffing recipe.

fontina-sake-2

Fontina Onion Sake Bread
Adapted from Cooking Light
Makes one 9 inch round loaf

11 ounces (about 2 1/3 cups) unbleached bread flour, plus extra as needed for dusting
1 ounce (about 1/4 cup) whole wheat flour
1 tablespoon cornmeal
2 teaspoons instant yeast
1 teaspoon salt
3/4 cup water, at room temperature
1/2 cup sake, at room temperature
5 ounces diced red onion (about 1 cup), divided
4 ounces coarsely grated fontina cheese (about 1 cup), divided
1/2 teaspoon sake
1 teaspoon chopped fresh thyme
1 teaspoon kosher salt
1/4 teaspoon freshly ground black pepper
1 large egg lightly beaten with 1 tablespoon water to make an egg wash

1.  In the bowl of a stand mixer, whisk together the flours, cornmeal, yeast, and salt.  Add the water and sake.  Using the dough hook, mix at low speed until a rough dough forms.  Increase the speed to medium-low, and knead until supple and elastic, about 6 minutes.

2.  Turn the speed to low.  Add half of the diced onion and half of the grated cheese, reserving the remainder, and mix until evenly incorporated in the dough.  Turn the dough out onto a lightly floured work surface.  Pulling the outside edges into the center, shape it into a round ball.

3.  Transfer the dough to a large lightly oiled bowl, turning to coat all sides with the oil.  Place smooth side up, and cover tightly with plastic wrap.  Let stand at room temperature until doubled in size, about 1 hour.

4.  Lightly grease a 9 inch round cake pan.  Turn the dough out onto a lightly floured work surface, and press gently to deflate.  Pulling the outside edges into the center, shape the dough into a flat round shape.  Transfer smooth side up to the prepared pan, and gently press as flat as possible.  Cover with lightly greased plastic wrap, and let rise at room temperature until doubled in size, or 30 to 45 minutes.  Preheat the oven to 400° F.

5.  Combine the remaining red onion, cheese, 1/2 teaspoon sake, thyme, salt, and black pepper.  Gently brush the dough with the egg wash, being careful not to deflate.  Sprinkle the onion and cheese mixture evenly over the top of the dough.

6.  Bake at 400° F for 35 minutes, or until a deep golden brown.  An instant-read thermometer should register around 200º F when fully baked.  Let cool briefly in the pan for 5 to 10 minutes before transferring to a wire rack to cool thoroughly before slicing.

Notes:
1.  You can certainly bake this loaf free-form instead of in a pan, if you prefer.  The bread will be a bit flatter in this case, but will have a higher proportion of crust to soft interior.

Posted in Savory, Yeast Breads | Leave a comment

Mustard Swiss Crackers

Week Forty-Nine: Breads With Cheese

mustard-swiss-crackers-1

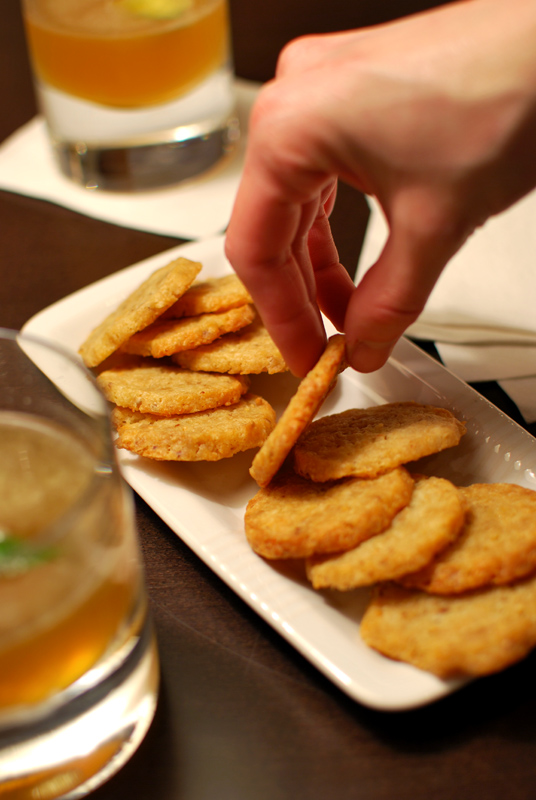
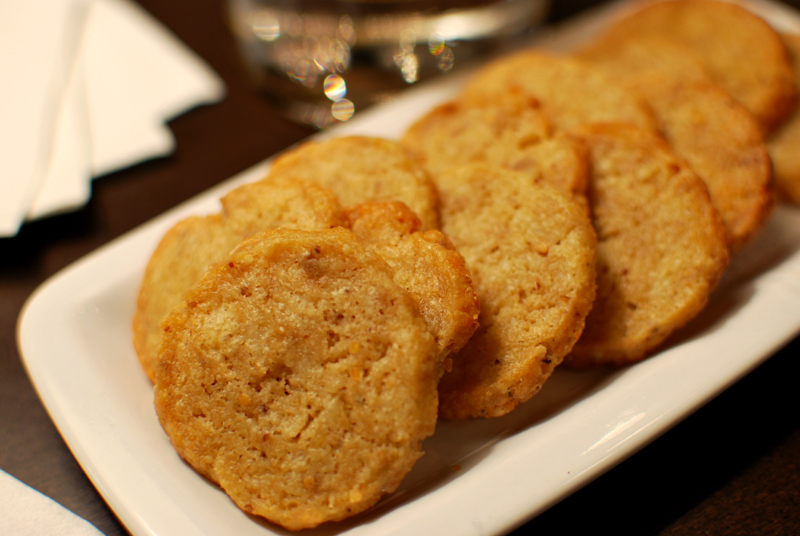
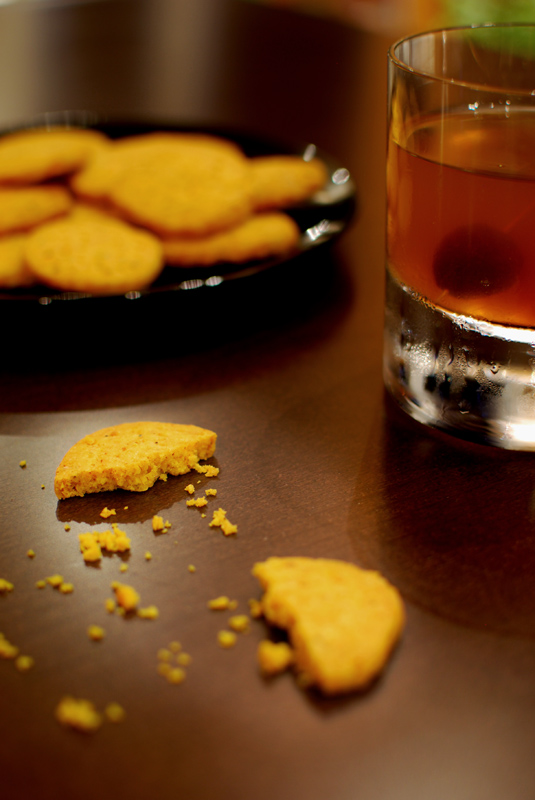
I know this week is about cheese, not spices anymore, but these mustard-heavy crackers are so good that I just couldn’t resist including them.  Of course, I have been known to eat mustard straight from the jar, so take that with a grain of salt.

Though the flavor of these crackers is unabashedly bold with mustard spice, the tangy Swiss cheese used here is no shy violet, either.  Indeed, the cheese not only deepens and grounds the exuberant taste of mustard, but it provides an excellent chewy texture as well, bringing a needed substance to what would otherwise be a crumbling structure.  Here, the cheese is not so much flavoring as it is backbone.

I’ve also used a healthy amount of whole wheat flour in this recipe, to provide a little nuttiness to complement the flavor of Swiss.  All together, the zip of mustard, the robust whole wheat, and the richness of the cheese make a harmonious group.  Easy enough to throw together, these crackers would be a special little snack, or better, a flavorful match to any warming soup you might be planning for these ever-colder nights.

mustard-swiss-crackers-2

Mustard Swiss Crackers
Adapted from Gourmet Magazine
Makes about 60 crackers

1/2 cup (1 stick) cold unsalted butter, cut into small pieces
8 ounces Swiss cheese, coarsely grated
2 1/2 ounces (about 1/2 cup) unbleached all-purpose flour
2 ounces (about 1/2 cup) whole wheat flour
3 tablespoons Dijon mustard
2 teaspoons dry mustard
1 1/2 teaspoons whole mustard seeds
1 teaspoon kosher salt

1.  Blend together the butter and cheese in a food processor until almost smooth.  Add remaining ingredients and pulse until just combined.  Divide the dough in half, and shape each half into a log about 8 inches long.  Wrap each log in parchment or wax paper, and freeze until firm, 1 1/2 to 2 hours.

2.  Preheat the oven to 350° F, placing a rack in the middle position.  Let 1 log of dough come to room temperature for 10 minutes before slicing.  Lightly butter a large baking sheet, or line with parchment paper.

3.  Cut 1 log crossways into 1/4 inch thick slices.  Arrange slices 1 inch apart on the prepared baking sheet.  Bake at 350º F until edges are just golden brown, about 15 minutes.  Rotate pan halfway through baking if necessary to ensure even browning.  Transfer crackers to a rack to cool.  Repeat with remaining dough.

Posted in Savory, Unleavened Breads | Leave a comment

Cheese and Herb Biscuits

Week Forty-Nine: Breads With Cheese

cheddar-biscuits

Bread and cheese.  The two just go together like Frick and Frack.  I don’t think I’ve ever seen a cheese plate served without some sort of bread, be it crackers or a sliced baguette; and there’s very little you can do to improve the taste of a fine piece of bread, other than spread it generously with a bit of your favorite cheese.

Though I’ve featured a few cheese-laden breads here and there, I’ve not devoted an entire week to them, and it’s high time I rectified that situation.  This week, I’ll be making all sorts of breads that involve cheese, from fast and easy breads to more elaborate concoctions, both sweet and savory.

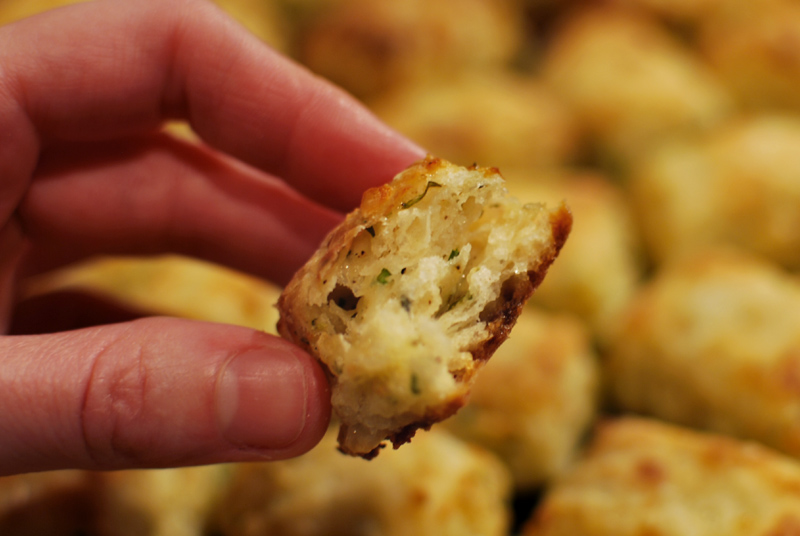
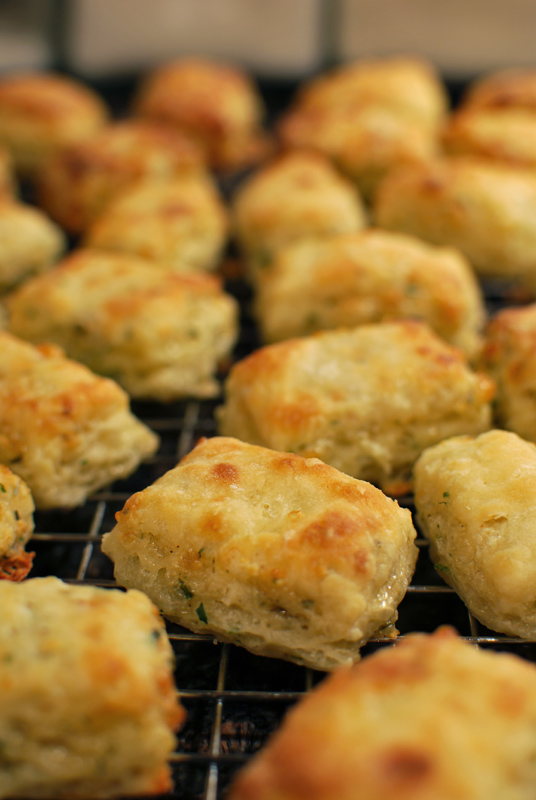
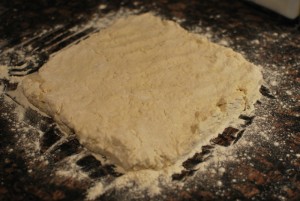
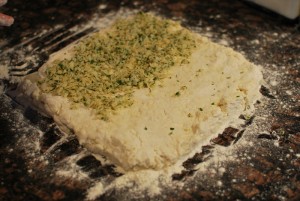
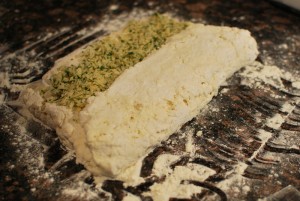
Today’s bread was recently featured in Bon Appétit magazine, and comes from the capable hands of Peter Reinhart.  Although the method seems long and a bit convoluted, it’s really quite straightforward (and I’ve included step-by-step pictures to help).  A quickly-made buttermilk biscuit dough gets rolled and folded with sharp cheddar cheese and herbs, resulting in gorgeously flaky bites of full-flavored goodness.

The cheese here affects the texture two ways: first, by creating a fantastically tender interior, due to its relatively high fat content, and second, by melting into an addicting crispness on the outside edges.  The sharp nuttiness it provides is the icing on the cake; paired with the freshness of herbs, it makes for one fantastic biscuit.

I’ve cut these biscuits into very small pieces, about 1 by 2 inches, which maximizes the crunchy exterior.  If you prefer more soft interior, just leave them a bit bigger, even twice the size.  But no matter how you cut them, and despite the large batch size, make sure to save yourself a couple before they vanish from the cooling rack.  And trust me, they will vanish.

cheddar-biscuits-2

Cheese and Herb Biscuits
Adapted from Peter Reinhart, via Bon Appétit
Makes 50 to 60 small biscuits

6 ounces (about 2 cups) coarsely grated sharp cheddar cheese
2 tablespoons minced fresh parsley
1 to 2 tablespoons dried herbes de Provence, to taste
1/4 teaspoon freshly ground black pepper
12 ounces (about 2 3/4 cups) unbleached all-purpose flour, plus at least 1/4 cup
extra for dusting
2 1/2 teaspoons baking powder
2 teaspoons sugar
3/4 teaspoon salt
1/2 teaspoon baking soda
1/2 cup (1 stick) unsalted butter, frozen at least 20 minutes
1 1/2 cups cold buttermilk

1.  Line 2 large rimmed baking sheets with parchment paper.  In a medium bowl, mix cheese, parsley, herbes de Provence, and pepper until combined.

2.  In a large bowl, whisk together the flour, baking powder, sugar, salt, and baking soda.  Using a coarse grater, grate the frozen butter into the flour mixture.  Toss gently with fingertips until evenly distributed.  Gently and quickly, stir in the buttermilk until just incorporated.  The dough will be very sticky.

3.  Sprinkle a clean work surface with 1/4 cup flour.  Scrape the dough onto the work surface, and sprinkle the top of the dough liberally with flour.  Using your hands, press the dough into a roughly 8 inch square, about 1/2 inch thick.  When needed, sprinkle with additional flour to prevent sticking.

biscuits-1

4.  Spread 1/2 cup of the cheese mixture over 2/3 of the surface of the dough.

biscuits-2

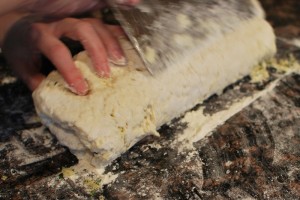
Fold the dough into thirds as you would fold a letter, using a bench scraper to help if necessary: lift and fold the uncovered 1/3 over half of the cheese-covered portion.

biscuits-3

Then lift and fold the folded portion over the remaining cheese-covered portion, still using the bench scraper to help as necessary.

biscuits-7

You should end up with a long rectangle shape.

5.  Sprinkle the dough with flour to prevent sticking.  Again, press the dough out to an 8 inch square.  Spread another 1/2 cup of the cheese mixture over 2/3 of dough, and repeat the folding process.  Again, press the dough out to an 8 inch square.

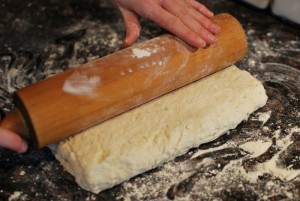
6.  Repeat the folding and pressing 2 more times with the dough and remaining cheese-herb mixture, for a total of 4 times.  After the final folding, roll out the dough with a rolling pin to a roughly 10 inch square, about 1/2 inch thick.

biscuits-8

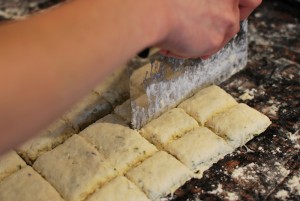
Cut the dough with a bench scraper or round pastry (or pizza) cutter into about fifty 1 x 2 inch pieces.

biscuits-9

Place the biscuits on the prepared baking sheets.  If your kitchen is hot, place the pans in the refrigerator to chill while preheating the oven to 500º F.  Position a rack in the center of the oven.

7.  Bake the biscuits, 1 sheet at a time, at 500º F until just golden on top, about 10 to 15 minutes.  Cool biscuits on the baking sheet at least 5 minutes.  If desired, cool completely on a wire rack, then rewarm in a 400º F oven for 3 minutes.

Notes:
1.  I used white cheddar, but feel free to use white or yellow as you prefer.

2.  This recipe calls for fresh parsley, as it loses much of its flavor when dried.  Instead of the herbes de Provence, feel free to use any mixture of dried or minced fresh herbs you like.

3.  To prepare these biscuits for the freezer, after cutting them out, place the biscuits in a single layer on the prepared baking sheets.  Freeze until firm, then wrap in a single layer in foil and enclose in plastic zip top freezer bags.  Biscuits may be frozen up to 2 weeks.  To bake, place frozen biscuits 1 inch apart on parchment-lined baking sheets, and thaw in refrigerator overnight.  Let biscuits stand at room temperature 20 minutes before baking as directed.

Posted in Quick Breads, Savory | 4 Comments

Sfogliata (Italian Paprika and Anchovy Bread)

Week Forty-Eight: Breads With Spices

sfogliata-1

I never wanted it to be like this.

You’re sitting there, life ticking along just like it ever had, and the next thing you know, things have gone all pear-shaped, and you’re more than a week behind on your blog that you’ve been quite diligent about all year.  No, I never wanted it to be like this, but here I am.

And so, Gentle Readers, I know I must make amends.  I must write faster, work harder, and generally put my nose back to the grindstone.  At present, I owe eight (!) posts, and I aim to provide them.  For your patience, and in humble apology, here is a picture of a kitty with a heart-shaped patch of fur:

sand-kitteh-2

And now, on to the bread.

Today’s bread is Italian in origin, but aside from that broad bit of information, it’s difficult to ascertain exactly what a sfogliata [sfoh-lee-AH-tah] is.  Some versions are sweet, some versions are savory, some are rolled up, some are flat like a pizza.  The word apparently means “a brief glance or look”, though that’s not really a descriptor.

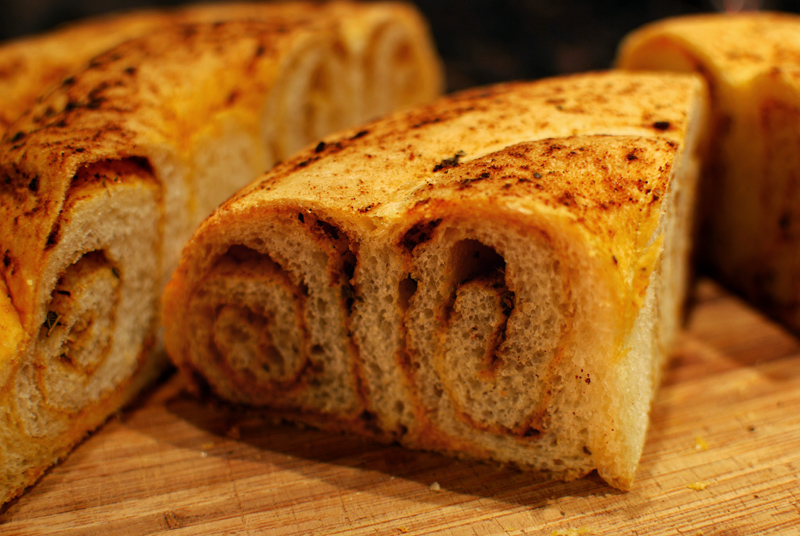
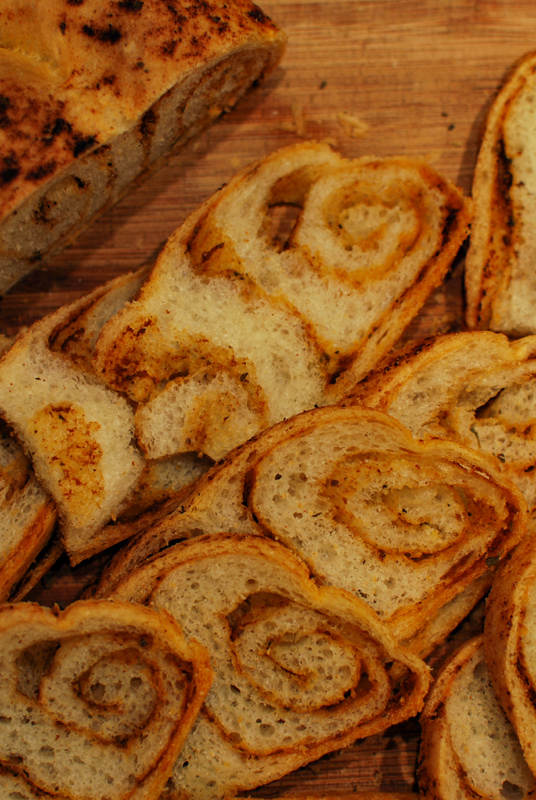
This version, however authentic or inauthentic it might be, involves a bold mixture of paprika, anchovies, and olive oil, which is brushed liberally over the flattened dough.  The dough is then rolled up and baked into a large round.  Is this real sfogliata?  I have no idea; but I can tell you that it is extremely good.

Overall, the bread is soft and vibrantly flavorful, with a pretty red-orange spiral throughout each slice from the paprika.  If you don’t think you’re a fan of anchovies, never fear; you won’t get any fishy flavor here, not even a hint, just a gorgeous depth of flavor.

The dough has a long rise, which makes for a more complex flavor, and a wonderfully open crumb.  The bit of semolina flour in the dough lends a sweetness and lightly rustic texture that stands up beautifully to the robust flavor of the seasoned oil.  A bit of oregano furthers the Italian air, and provides a green freshness.

A bit too brash to match most entrées well, this bread would be an excellent appetizer, or late night snack.  The flavor of sweet paprika really shines here, in the best possible way.  If you have it, use the smoked sort, as it would lend a sultry richness to the bread that’s making my mouth water just to think of.  Just avoid using hot paprika; there’s enough paprika here that the hot kind would set your mouth on fire just by looking at it.

sfogliata-2

Sfogliata (Italian Paprika and Anchovy Bread)
Adapted from Evan Kleiman, via Epicurious.com
Makes one 9 inch round loaf

For the dough:
6 ounces (about 1 1/2 cups) unbleached all-purpose flour
3 ounces (about 3/4 cup) semolina flour
1 1/2 teaspoons instant yeast
1 teaspoon salt
3/4 cup warm water, at room temperature
2 tablespoons extra-virgin olive oil

For the seasoned oil:
1/3 cup extra-virgin olive oil
1 tablespoon sweet paprika
1 teaspoon dried oregano (or 2 teaspoons fresh)
4 anchovy fillets from a can, drained, patted dry, and minced
1/2 teaspoon salt

1.  In the bowl of a stand mixer, whisk together the flour, semolina, yeast, and salt.  Add the water and oil.  Using the dough hook, combine at low speed until all dry ingredients are moistened.  If dry pockets of flour remain, drizzle in additional water until they no longer remain.  Turn the mixer off, and without removing the bowl or the hook, cover loosely with plastic wrap and let stand for 15 to 20 minutes.

2.  After resting, remove the plastic wrap.  Increase the speed to medium-low, and knead until dough clears the sides of the bowl, and is smooth and supple, 6 to 7 minutes.

3.  Transfer dough to a large, lightly oiled bowl, turning to coat all sides of the dough with oil.  Cover tightly with plastic wrap, and let stand at room temperature until doubled in bulk, 1 to 1 1/2 hours.

4.  While dough rises, make the seasoned oil by whisking together all ingredients in a small, non-staining bowl (such as glass or stainless steel) until combined.  Cover and let infuse while the dough rises.

5.  Brush a 9 inch round cake pan with some of the seasoned oil.  Turn the dough out onto a lightly floured surface, and press gently to deflate.  Sprinkling with just enough flour to prevent sticking, roll the dough out to a roughly 18 inch round, about 1/8 inch thick.  If the dough resists, cover and let rest for about 15 minutes before trying again.

6.  Brush the surface of the dough liberally with the remaining oil, leaving a 1/4-inch border around edge, and reserving about 1 tablespoon of the oil.  Roll up the dough, jelly roll style, as tightly as possible, and pinch the seam to seal.  Some of the oil will seep out as you roll.

7.  Position the roll seam side down, and form into a loose coil in the prepared pan.  Gently press on the coil to flatten slightly, and brush with the remaining seasoned oil.  Cover loosely with plastic wrap, and let stand at room temperature until doubled in size, about 1 hour.  Preheat the oven to 375º F, and place a rack in the middle position.

8.  Bake at 375º F until golden brown and baked through, 35 to 40 minutes.  Let cool in the pan briefly.  When able to handle, transfer the bread to a wire rack to cool completely before slicing, at least 1 hour.

Notes:
1.  Bread keeps, wrapped well in plastic wrap, for 2 days at room temperature.  Alternatively, it may be wrapped and frozen for up to 1 month, to be reheated in a 350º F oven for 10 to 15 minutes, or until heated through.

2.  If you don’t have a round cake pan, you may use a square metal pan, about 8 inches on each side.  The loaf may also be baked freeform, preferably on a sheet of parchment paper, though it will result in a flatter loaf.

Posted in Savory, Yeast Breads | 1 Comment

Eggnog Bread

Week Forty-Eight: Breads With Spices

eggnog-bread

I know I’ve been absent lately, but I have been making bread every day as I’m supposed to; I just haven’t been writing about it.  I will make up the previous posts for this week as I’m able, but I just had to post today about the bread for today.

Today is the day after Thanksgiving, known as Black Friday to the Good Capitalist in all our hearts; but to me, it’s got a very different meaning.  Today is the day when I sit at home in my pajamas, laughing at all those who dare venture to any place of mercantilism, make eggnog, and put up the Christmas tree.

As soon as the weather turns cold, I begin to feel the excitement for this day building within me.  Growing up in New Orleans, the entrance of cold weather usually coincided happily with this day; but now living in Chicago, this means that I start to get excited to put up my little tree in about mid-September.  The wait is excruciating.

Since I was in high school and my Mom happily turned over decorating-the-tree duties to me, it has been a tradition for me to haul the musty boxes out of the attic, unravel the lights, checking each strand for outages, hand-pick the ornaments pretty and beloved enough to occupy the prime real estate on the front of the tree, and generally make a huge mess with the tinsel.  This wholly unnecessary and entirely joyous work happens over a background of Christmas movies repeated ad nauseam on the television, until I get sick of hearing the same lines over and over, and put on Christmas music instead.

But the most important part of the day, for me, is the eggnog.  Sweet, thick, rich, and eggy, it’s the sort of drink that I abhor every other day of the year; but it’s one that I dearly look forward to having on just this one day.  Having tried many types, there’s only one commercial brand that I’ve found acceptable, but homemade is absolutely, hands-down, no question the way to go, and always with a generous garnish of freshly grated nutmeg on top.

I’ve written my go-to eggnog recipe below, which produces a sweet, half-rich, boozy, and full-flavored eggnog.  The eggs in it remain uncooked, so if you have concerns about that, the Joy of Cooking contains a cooked eggnog recipe that is quite good as well.

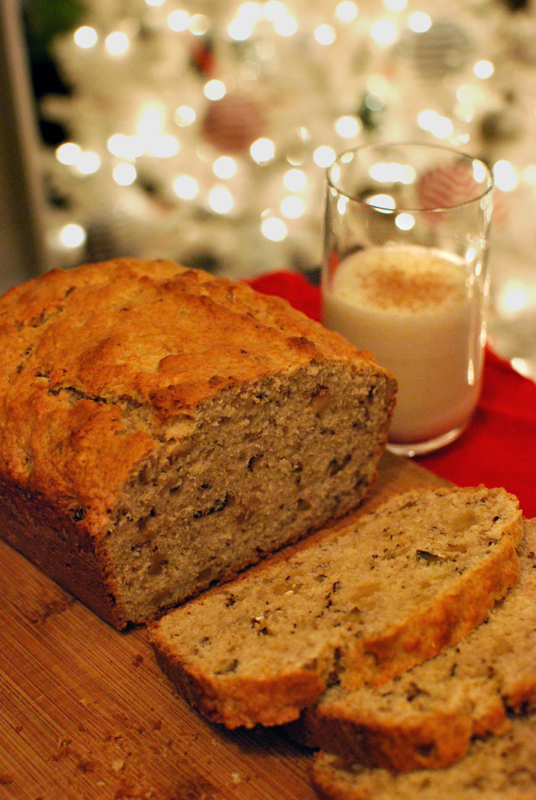
In the spirit (no pun intended) of the day, I’ve created a bread based on this beloved drink, and using the nog I was going to make anyway.  It uses eggnog as the majority of the moisture, with walnuts added for body and crunch. This bread has a decidedly eggy flavor, deepened with the bourbon, brandy, and rum in the nog.

But no eggnog (bread, drink, or otherwise) would be complete without the nutmeg, and it’s here in spades.  I’ve used a suitably heavy hand with it, bringing a bright warming spice to each bite.  This loaf is sweet, rich, and full-flavored, just like the drink that inspired it.  It slices easily, and is superb when toasted, especially with a lashing of good butter for an indulgent breakfast or snack on these chilly days.  One taste of this tender bread, and you’ll be converted, even if you’ve never liked eggnog before.  Well, at least for one day, you will.


Eggnog Bread
Makes one 9 x 5 inch loaf

1 cup walnuts
11 ounces (about 2 1/2 cups) unbleached all-purpose flour
2 teaspoons baking powder
1/2 teaspoon ground nutmeg
1/2 teaspoon salt
1/4 teaspoon baking soda
1 large egg
1/2 cup sugar
1/3 cup butter, melted and cooled slightly
1 1/3 cups eggnog (preferably homemade, recipe below)

1.  Preheat the oven to 350º F.  Butter a 9 x 5 inch loaf pan.  Add a spoonful of flour, shaking around to coat the entire inside of the pan.  Knock out the excess flour.

2.  Spread the walnuts in a single layer on a sheet pan, and toast in the oven for 5 to 8 minutes, or until fragrant.  While still warm, chop, and set aside to cool slightly.

3.  In a medium bowl, whisk together the flour, baking powder, nutmeg, salt, and baking soda.

4.  In a large bowl, or with an electric mixer, whisk the egg with the sugar until pale yellow and thick, 3 to 5 minutes.  Whisk the butter in slowly.  Stir in the eggnog.

5.  Add the dry ingredients, and fold in gently with a spatula until the flour is mostly moistened.  Add the walnuts, and fold in until no more pockets of dry ingredients remain.  Scrape batter into the prepared loaf pan, and smooth the top.

6.  Bake at 350º F until golden brown and the loaf feels firm when pressed gently in the middle, about 45 minutes.  Let cool briefly in the pan, about 5 minutes, before transferring to a wire rack to cool thoroughly before slicing.


Eggnog
Adapted from The Joy of Cooking
Makes 10 servings

3 large eggs, whites and yolks separated
4 ounces (about 1 cup) powdered sugar
1/2 cup bourbon
1/2 cup spiced rum
1/2 cup brandy
1 cup cream
1 1/2 cups milk
Nutmeg, for garnish

1.  In a large bowl, whisk the egg yolks until light in color and fluffy, about 3 minutes.  Slowly whisk in the powdered sugar.  Mixture will be thick.  Gradually whisk in the bourbon, beating constantly.  Cover and let stand at room temperature for 1 hour to dispel the eggy taste.

2.  Add the rum, brandy, cream, and milk to the egg mixture, and whisk to combine.  Cover again, and refrigerate for 1 to 3 hours.

3.  Using an electric mixer, beat the egg whites until medium-stiff peaks form.  Add to the other ingredients, and fold or gently whisk to incorporate.  Serve portions with a generous grating of fresh nutmeg.


Notes:
1.  Nutmeg loses its flavor very quickly after being grated, so I highly recommend grating your own whenever possible, especially as garnish for drinking eggnog.  It’s hardly any trouble, and the incredible flavor is more than worth it.

2.  I created this bread recipe based on the sweetness, booziness, and egginess of the above eggnog recipe.  If using store-bought eggnog, you may want to increase or reduce the amount of sugar, and perhaps replace some of the amount of eggnog with brandy or rum.

Posted in Quick Breads, Sweet | Leave a comment

Mustard Pan Rolls

Week Forty-Eight: Breads With Spices

mustard-rolls

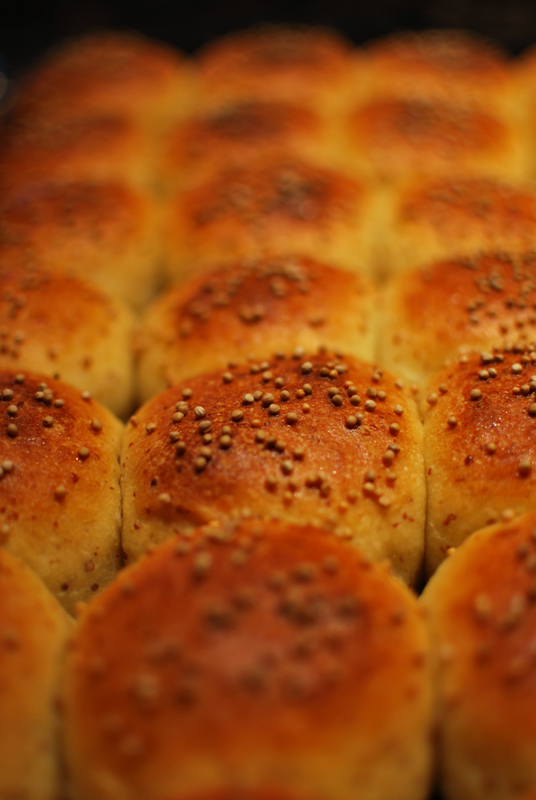
I had originally intended to post this on Thanksgiving day, as I thought they would be an appropriate choice for any table, however lightly- or heavily-laden.  Vibrant with mustard and gently but deeply sweetened with maple syrup, they provide a new and moderately pungent counterpoint to the typically rich holiday fare.

But not to veer too far from the path of familiarity, so important on such a day, these rolls have a soft texture and convivial pull-apart nature that keeps them firmly in their obligatory place in the bread basket.  These tender breads are a welcome departure from the plain, unadorned dinner roll, but are delicious enough to win the admiration of any staunch traditionalist.

Mustard Rolls
Adapted from Gourmet Magazine
Makes 32 to 40 small rolls

For the dough:
1 1/4 cups milk, at room temperature
1/2 cup whole-grain or coarse-grained Dijon mustard
6 tablespoons unsalted butter, melted and cooled slightly
1/4 cup pure maple syrup
1 large egg
27 ounces (about 6 cups) unbleached all-purpose flour
4 teaspoons instant yeast
1 tablespoon salt

For the glaze:
2 tablespoons unsalted butter, melted and cooled
1 tablespoon pure maple syrup
1 large egg, beaten lightly
1 teaspoon whole mustard seeds, for sprinkling

1.  In the bowl of a stand mixer, whisk together the milk, mustard, butter, maple syrup, and egg, until combined.  Reserve 2 ounces (about 1/2 cup) of the flour, and add the rest to the wet ingredients, along with the salt and yeast.

2.  Using the paddle attachment, mix at low speed until all the flour is moistened and a rough dough forms.  Switch to the dough hook, and knead at medium-low speed until smooth and elastic, 6 to 7 minutes.  Add the reserved flour as needed to form a soft dough that clears the sides of the bowl, but still sticks to the bottom.

3.  Turn the dough out onto a lightly floured work surface.  Pulling the outer edges into the center, shape the dough into a round ball.  Transfer dough, smooth side up, to a large lightly oiled bowl, turning to coat with oil.  Cover tightly with plastic wrap and let rise at room temperature until doubled in size, about 1 hour.

4.  While dough rises, make the glaze.  Whisk together the butter, maple syrup, and egg. Cover and set aside.

5.  Lightly grease a baking sheet, or line with parchment.  Turn the dough out onto a lightly floured work surface, and press gently to deflate.  Divide the dough into 4 equal pieces, then divide each piece into 8 to 10 small pieces (for a total of 32 to 40 rolls).

6.  Keeping the unused pieces covered loosely with plastic wrap, shape each piece into a round ball.  Transfer to the prepared pan, leaving 1/2 inch or less space between each roll.  Brush the rolls with some of the glaze, and cover loosely with lightly oiled plastic wrap.  Let stand at room temperature until doubled in size, about 1 hour.  As they rise, the rolls will grow to touch each other.  Thirty minutes before baking, preheat the oven to 400º F, and place a rack in the middle position.

7.  Brush the rolls with remaining glaze (you may or may not use all of it), and sprinkle with the mustard seeds.  Bake at 400º F for 20 to 25 minutes, or until golden brown.  Rotate the pan halfway through to ensure even browning.  Set the pan on a rack, and cool the rolls on the pan for 20 minutes.  Serve immediately, or remove to a wire rack to cool completely.

Notes:
1.  Rolls may be made 1 day ahead and kept covered in a cool dry place.  Alternatively, they may be wrapped well and frozen for up to 1 month. Thaw at room temperature, or by heating in a 350º F oven for 5 to 10 minutes, or until heated through.

Posted in Savory, Yeast Breads | 1 Comment

Cumin Curry Popovers

Week Forty-Eight: Breads With Spices

popovers-1

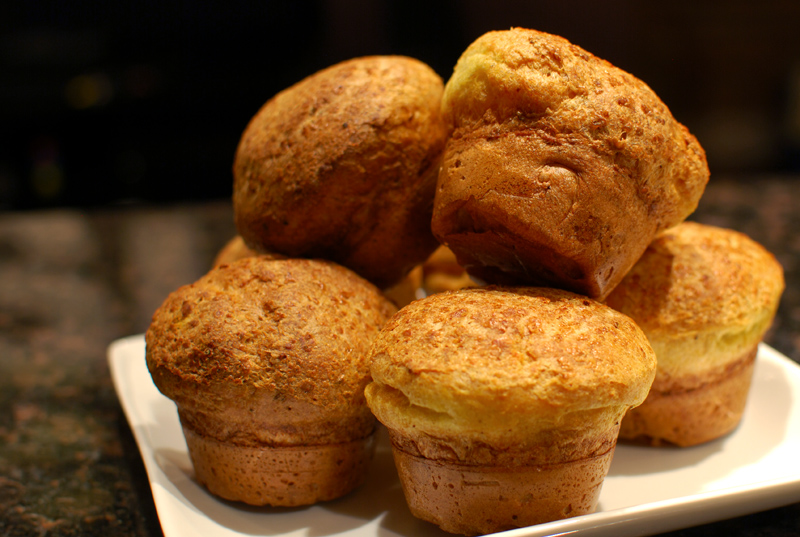
Popovers, as I’ve come to discover over the course of the year, are among the most underrated breads out there.  Their airy, crunchy, and tender texture is universally appealing; but best of all, the elegant things could hardly be easier to whip up.  I mean this nearly literally: if you can whisk flour into liquid, you can make great popovers.  Not “good”, mind you, great.

Some may insist that the best popovers involve any one, or a combination, of the following: a one-hour (minimum) rest before baking, no rest before baking, a very hot oven, a cold oven, a very hot then moderate oven, a preheated pan, a cold pan, and/or a partridge in a pear tree.

Truth is, I’ve used all those methods, and I’ve not noticed much difference with any of them.  They’ll all produce equally good results – or equally bad results, if you open the oven door before the structure has set.  Just use whatever you feel most comfortable with, or whatever matches your schedule best.

popovers-2

But as good as a standard popover is, sometimes it can be a bit… plain.  Sure, it’ll go with any food from here to next week, but every so often, you want something more.  Rather than the agreeable, decorous nature a popover usually has, you want something a bit less genteel, a little risqué even.

To liven things up a bit, here we have the deep smoke of cumin combined with the bright spice of curry powder, resulting in a popover that’s just as easy, just as soigné, but far more sultry.  And though the flavors are far different, this variation still does as good a job at pairing with a wide variety of foods as their plain-Jane cousins.

Picture serving a basket full of these, piled high.  Break one open, and like a jewel box, you find the interior a stunning display of gold.  The smell of cumin hits your nose, and you crunch through a bite.  They’re not like any popover you’ve ever had before, but if new versions are all this delicious, you’d be willing to branch out a bit more often.

And as easy as they are, you really have no excuse not to.

popovers-3

Cumin Curry Popovers
Adapted from Gourmet Magazine
Makes 6 to 9 popovers

1/2 teaspoon whole cumin seed
1/2 teaspoon whole mustard seed
2 large eggs
3/4 cup milk
1/4 cup water
1 tablespoon unsalted butter, melted and cooled slightly
4 ounces (about 1 cup minus 2 tablespoons) unbleached all-purpose flour
1 teaspoon curry powder
1/2 teaspoon salt

1.  Preheat the oven to 375° F, and place a rack in the lower third of the oven.  Generously grease six popover tins, or nine standard (1/2 cup) muffin tins.

2.  In a small pan over medium heat, toast the cumin and mustard seeds until fragrant, 3 to 5 minutes.  With a mortar and pestle, coarsely crush the seeds.

3.  In a bowl, whisk together the eggs, milk, and water.  Add the melted butter in a stream, whisking constantly.  Add the flour, curry, salt, and ground cumin and mustard.  Whisk until combined, but still slightly lumpy.

4.  Divide the batter evenly among the prepared tins.  If desired, sprinkle additional whole cumin seeds over popovers.  Bake at 375º F for 45 minutes. Using a small, sharp knife, cut a small slit about 1/2 inch long in the side of each popover to release steam.  Bake for an additional 10 minutes.  Remove from pan, and cool slightly before serving.

Notes:
1.  Popovers may be cooled completely, then wrapped well and frozen.  Reheat in a 350º F oven for 3 to 5 minutes, or until warmed through.

Posted in Savory, Unleavened Breads | Leave a comment

Onion Flatbreads With Coriander and Cumin

Week Forty-Eight: Breads With Spices

coriander-1

Today’s bread is a thick type of the flatbreads so omnipresent in the Middle East.  More substantial than a pita, these breads are topped with a mixture of lemony coriander seed, smoky cumin seed, and sweet-tart red onion.  A small handful of mint rounds out the fragrant topping, and brings a needed brightness.

Though these are too thick to wrap around and cradle food, as you might use a thinner flatbread, they would be perfect to slice open horizontally, like a sandwich roll, and fill with kibbeh, hummus, lamb patties, falafel, or whatever specialty you like.  The flavors of coriander, cumin, onion, and mint are so common in the food of this region of the world, and match a wide variety of foods so well, that disharmony of tastes would be unlikely.

The flavor of the bread itself is very mild, tending towards boring even; but that lets the aromatic topping take center stage instead.  A fair amount of whole wheat flour is added for a more rustic bread, and to deepen the flavor as well.  Overall, it’s a respectable little recipe that can be easily adapted to any personal preference you might have, either in topping or filling.

coriander-2


Onion Flatbreads With Coriander and Cumin
Adapted from Bread, by Christine Ingram and Jennie Shapter
Makes 12 flatbreads

For the dough:
7 ounces (about 1 1/2 cups) unbleached bread flour, plus extra for dusting as needed
7 ounces (about 1 1/2 cups) whole wheat flour
2 1/4 teaspoons instant yeast
1 teaspoon salt
1 1/4 cups water, at room temperature
1 tablespoon olive oil

For the topping:
1 tablespoon whole coriander
1 1/2 teaspoons whole cumin
1/4 cup finely chopped red onion
1 tablespoon dried mint
2 tablespoons olive oil

1.  In the bowl of a stand mixer, whisk together the flours, yeast, and salt.  Add the water and olive oil, and mix with the dough hook at low speed until all the flour is moistened, 1 to 2 minutes.  Turn the mixer off, and without removing the bowl or the hook, cover loosely with plastic wrap.  Let sit for about 20 minutes.

2.  Remove the plastic wrap.  Turn the mixer to medium-low speed, and knead until the dough is smooth and supple, 5 to 7 minutes.  The dough should clear the sides of the bowl, but not be stiff.  Add additional flour or water as needed to correct the consistency.

3.  Turn the dough out onto a lightly floured work surface.  Pull the outer edges of the dough into the middle, shaping the dough into a round ball.  Transfer the dough to a large, lightly oiled bowl, turning to coat the dough with oil.  Position the smooth side of the dough on top, and cover tightly with plastic wrap.  Let stand at room temperature until doubled in size, about 1 hour.

4.  While the dough rises, prepare the topping.  In a skillet over medium heat, toast the coriander and cumin seeds until fragrant, 3 to 4 minutes.  Crush coarsely in a mortar and pestle.  Combine with the chopped onion and mint, and set aside.

5.  Using a nonstick spatula, fold the dough over itself in thirds, as you would fold a letter, deflating the dough.  Cover and let rest 5 to 10 minutes.

6.  Turn the dough out onto a lightly floured surface.  Divide the dough into 12 even pieces, and shape each into a round ball by rolling underneath your palm on the counter.  Flatten the balls slightly.  Cover and let rest 10 minutes.  Line a large baking sheet with parchment paper, or sprinkle with flour or cornmeal.

7.  Using hands or a rolling pin, flatten the dough into discs about 1/2 inch thick, making them slightly concave in the middle.  Transfer to the prepared baking sheet.  Dock the discs all over with a fork.

8.  Brush the dough lightly with the olive oil, and sprinkle liberally with the topping mixture.  Press the topping gently into the dough to help it adhere.  Cover loosely with plastic wrap, and let rise at room temperature for 45 minutes, or until nearly doubled in size.  Preheat the oven to 400º F.

9.  Bake the breads at 400º F for 15 to 20 minutes, or until lightly browned and cooked through.  Transfer to a wire rack to cool thoroughly.

Posted in Savory, Yeast Breads | 1 Comment

Curry Spiced Shortbread Crackers

Week Forty-Eight: Breads With Spices

spicy-shortbreads-1

When made with butter, crackers can often be finicky things.  Usually, the biscuit method is used, wherein butter is cut into flour, and moisture added until a dough forms.  And woe betide the cook who mixes or rolls or handles the dough too much, for his reward shall be tough and leathery things, instead of the airy delights planned.

Here lies the appeal of today’s recipe.  A wealth of butter is used, but a different method is used to incorporate it, one most often seen in cookie-making.  Indeed, if you’ve ever made icebox (aka: slice and bake) cookies, you’re no stranger to the simple process involved.

The butter is softened, then creamed with just enough sugar to provide a fluffy texture, dry ingredients are mixed in, and the dough shaped into a log to be chilled before slicing and baking.  But that’s where the similarities end; despite the sandy shortbread texture, the finished crackers are as far from a cookie as apples are from oranges.

Spices blossom warmly on your tongue with each bite, first bright with hints of paprika and pepper, then bold with curry and turmeric, which lend their cheery yellow color, and finally finishing with a soft sweetness that makes you crave another nibble.  Poppy and mustard seeds bring a mild depth, but are present more to provide a gentle crunch in contrast to the easy crumble of the crackers.

These saffron-hued coins make an unassuming and pretty addition to an array of hors d’oeuvres, but might very well steal the show with their delicate texture and pop of flavor.  Though the overall taste is far from subtle, these make an excellent match for any number of cocktails.  They paired fantastically with a quickly-made watercress guacamole and a cold flute of crisp Champagne; though I neglected to photograph that (still kicking myself, as it was gorgeous), you’ll have to trust me that it was as peppery, creamy, and delicious as it sounds.

Easy to make, the dough will rest in the refrigerator or freezer until you’re ready to bake, and will produce crackers that are a little too easy to have just one more of.  Could there be a better cocktail snack?  Perhaps; but as long as I’ve got these around, I don’t care to find out.

Curry Spiced Shortbread Crackers
Adapted from Gail Monaghan, via Food & Wine Magazine
Makes about 2 dozen

1 1/2 sticks (6 ounces) unsalted butter, at room temperature
1/4 cup sugar
11 ounces (about 1 1/2 cups) unbleached all-purpose flour
1 1/2 teaspoons whole mustard seed
1 teaspoon poppy seed
1 teaspoon curry powder
1 teaspoon ground turmeric
1 teaspoon kosher salt (or 3/4 teaspoon table salt)
3/4 teaspoon sweet paprika
1/4 teaspoon chili powder
1/8 teaspoon freshly ground black pepper
1/8 teaspoon cayenne pepper
1 to 2 tablespoons milk or cream, or as needed

1.  Using an electric mixer, beat the butter and sugar at medium speed until light and fluffy, about 2 minutes.

2.  Meanwhile, whisk together the flour, seeds, and spices.  Gradually add the dry ingredients to the butter, and mix until just blended.

3.  Scrape the dough out onto a sheet of parchment or wax paper, and pat it into a log about 1 1/4 inches in diameter.  Shape the log into a cylinder or a rectangle, and wrap completely with the paper, twisting the ends to seal.  Refrigerate until firm, about 1 hour.  At this point, the dough can be refrigerated for up to 1 day, or frozen for up to 1 month.  If frozen, thaw in the refrigerator before slicing.  If refrigerated for more than 1 hour, let sit at room temperature for 10 to 15 minutes before slicing to prevent the dough shattering.

4.  Preheat the oven to 350° F.  Line a large baking sheet with parchment paper.  Slice the dough crossways into 1/4 inch thick slices, and arrange on the prepared baking sheet.  With a fork, dock the top of the shortbreads all over.

5.  Bake at 350º F for about 20 minutes, or until golden but not browned.  Slide the parchment onto a wire rack and let the shortbreads cool before serving.

Notes:
1.  The cooled shortbreads can be stored in an airtight container at room temperature for up to 1 week or frozen for up to 1 month.

2.  Don’t be tempted to reduce the sugar; it’s graininess is necessary to aerate the butter for the most delicate and crumbling texture.

3.  A small warning: don’t serve these on or near anything that may stain (ceramic, glass, stainless steel are all okay).  Turmeric and curry, though delicious, are notorious for their ability to leave their permanent yellow signature on anything they can.

Posted in Quick Breads, Savory | Leave a comment

Roti Canai

Week Forty-Seven: Miscellaneous International Breads

roti-canai-1

A few months ago, I was alerted to a type of Malaysian bread that I’d never heard of before, called roti canai [RO-tee chan-EYE].  As I’ve mentioned before, I dearly love discovering new breads, and am constantly amazed at how much variety there can be from such few and humble ingredients.

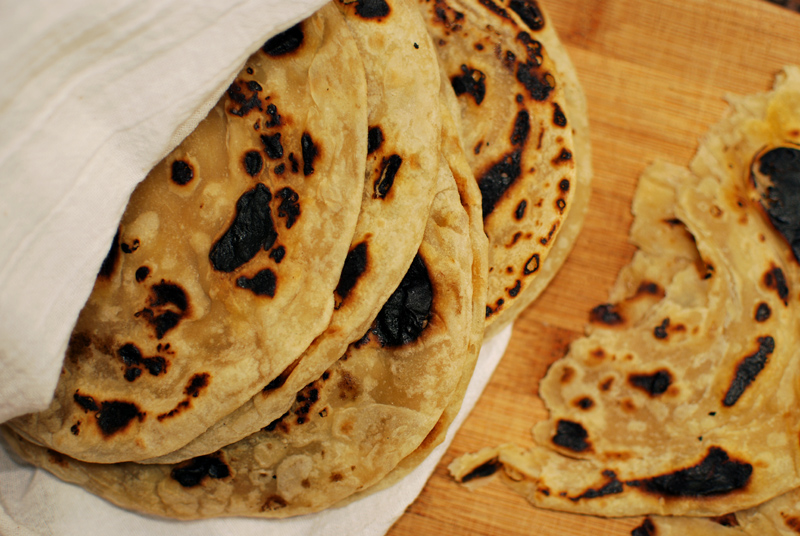
Though I’ve never been to Malaysia, or had the opportunity to have real roti canai, this beloved bread seems to be exactly the type of bread I crave: flaky, chewy, crisp-edged, and lightly charred for notes of smoke.  Roti canai inspires a great deal of fond remembrances from expat Malaysians and tourists alike.

Served mostly from the ubiquitous Mamak food stalls, these flatbreads are served either plain or with any number of ingredients mixed into the dough.  When plain, they are usually round, but when filled, they’re more often square, due to the folding process.  Their widespread popularity stems from the fact that they can comprise a whole meal, and don’t require utensils to eat, which also explains their popularity as a late-night snack or breakfast.

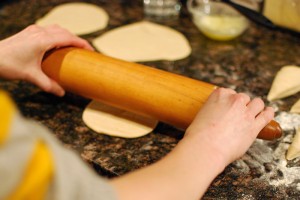
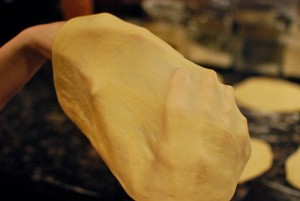
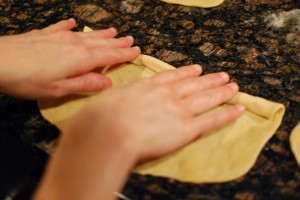
The typical method for making this bread involves a practiced series of flipping and stretching the dough to tissue-thickness, as seen here; it’s a method that I didn’t even bother to try on my own, though it does look like fun.  Instead, taking a cue from a few roti canai recipes I ran across, I’ve used a system of flattening, buttering, rolling up, and flattening the dough again.  A very similar technique was employed when I made ensaïmadas some time ago, except that roti canai are flattened a second time.

The result might not be wholly authentic, but it was absolutely delicious.  Tender inside, and the thin outer layer crisp and slightly charred, it was a perfect match for a simple curry, but would be just as good with anything from soup to a fried egg.  The flavor is mild enough to match whatever you like, but it’s so delicious that you’ll want to serve it with everything.

(And a big, special thanks to Sarah for the tip about this wonderful bread!)

Roti Canai
Makes 12 flatbreads

8 ounces (about 1 3/4 cups) unbleached all-purpose flour, plus extra for dusting
4 ounces (1 cup minus 2 tablespoons) white whole wheat flour (see note 1 below)
1/2 teaspoon kosher salt
1 stick butter, melted and cooled slightly, divided
3/4 cup water, at room temperature

1.  In a large bowl, whisk together the flours and salt.  Drizzle in 2 ounces (1/2 stick) of the melted butter, and toss or rub in until absorbed.  Add the water, and stir until a rough dough forms and all flour is moistened.  If dry spots remain, add additional water by spoonfuls until there are no more.

2.  Turn out onto a work surface, and knead until smooth and elastic, 3 to 5 minutes.  Cover with plastic wrap, and let rest for at least 1 hour, and up to 3 hours.  Alternatively, the dough may be wrapped tightly and refrigerated for 1 day.  Bring to room temperature for 30 minutes before proceeding.

3.  Divide the dough into 12 equal pieces.  Roll into roughly round balls between palm and counter, flatten slightly, and set aside, covered loosely with plastic wrap.  Let rest for 15 to 30 minutes.

4. Using a rolling pin and your hands, roll or press each ball of dough until flat, dusting with only as much extra flour as needed to prevent sticking, or use a little melted butter on your hands.

roti-canai-2

Lift the dough and stretch it until very thin and nearly transparent; or, if you’re confident, try rapidly flipping the dough until tissue-thin, as seen in this video.

roti-canai-3

The dough should be strong and supple enough to easily stretch like this; if it resists, cover and let rest for about 15 minutes.

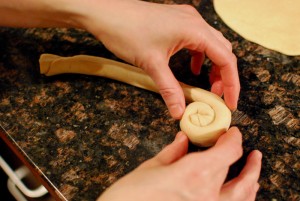
5.  Brush the top of the dough with some of the reserved melted butter, and tightly roll up jelly-roll style into a long, thin cylinder.

roti-canai-5

Coil the cylinder, seam-side down, and pinch the end to seal.

roti-canai-6

Set aside and keep covered while shaping the remaining dough.

roti-canai-7

6.  Using a rolling pin, and dusting with only enough flour to prevent sticking, roll each coil out to a flat round, about 6 inches across.

7.  Heat a nonstick pan over medium-high heat, until hot but not smoking.  Brush each piece of dough with melted butter, and place buttered-side down in the heated pan.  Brush the unbuttered side with butter.  Cook for 40 to 60 seconds, or until just beginning to puff and the edges look dry, then flip dough over.  Cook for an additional 30 to 45 seconds, or until browned or lightly charred in spots.  If needed, flip again and cook the first side for a few more seconds until done.  Stack cooked roti wrapped in a kitchen towel to keep warm until serving.

Notes:
1.  If you don’t have white whole wheat flour, you can substitute a mixture of all-purpose and regular whole wheat flour, combined in equal amounts.

Posted in Savory, Unleavened Breads | 2 Comments